
Zodiac Weapons (A Realm Reborn)


Lore
Eorzea has witnessed a resurgence of the old ways in recent days, as adventurers the realm over take up the ancient trades of warrior and dragoon, bard and black mage, and more. Now, it is the traditional weaponry of these old mantles that are sought, the means of their making long since lost to the ages. It would seem this longing for things past and old is not limited merely to the schools of war and magic. The reformation of Eorzea's Grand Companies was born of a longing in the hearts of the free peoples of Eorzea — a longing for the days of old and the peace they knew. It is a sentiment that has since spread to the realm's adventurers, guiding them toward the rediscovery of trades from a former age that had all but died out. Small wonder, then, that those who have mastered these ancient ways of battle and sorcery now seek the weapons of eld which will enable them to realize the truest expression of their newfound powers. Thus have adventurers begun their quest for the relics.
- FFXIV Lodestone
Prerequisites
- Disciple of War or Magic at Level 50 with job quests completed.
- Completion of The Ultimate Weapon.
- Completion of The Weaponsmith of Legend.
⚠️ Note!
Most of the quests for the Zodiac Weapons are not repeatable like newer relics.
Instead, instructions will be provided and the quest completes itself.
After you complete the steps for the quests, the required items can then be turned in to the vendor with the weapon in your inventory.
If you need to review information, refer to this guide or otherwise find it in-game under the Completed section of your journal.
ℹ️ See also
Some of the steps will require that you equip the relic weapon to be able to complete the objectives.
Initial Preparations
A good website that can help sorting through this unfathomable grind:
https://ffxivrelictracker.com/
If you complete one full weapon grind, you will unlock the repeatable quests for the subsequent weapons, speeding up the process if doing all of them.
As some steps require materials bought with Allagan Tomestone of Poetics, Grand Company Seals or Allied Seals you can get ahead gathering some of them before starting. Specially the Grand Company and Allied Seals (Hunts) materials.
While there are other materials required for certain crafts further on, here is a brief list of some of the materials needed:
| Material | Amount | Cost (Total) | Buy early? | Where |
|---|---|---|---|---|
| Radz-at-Han Quenching Oil | 1 | 15 Poetics | ✔️ (Can only hold one) | Auriana |
| Thavnairian Mist | 3 | 60 Poetics | ✔️ | Auriana |
| Books | 9 | 900 Poetics | ❌ (One at a time) | G'jusana |
| Superior Enchanted Ink | 3 | 75 Poetics | ✔️ | Auriana |
| Alexandrite | 75 | Variable - Each map costs 75 Poetics and gives 5 Alexandrite. Map is lost if failed. Can also be bought for 50 Allied Seals each. |
❌ (Requires maps) | Auriana (Map Exchange) |
| Bombard Core | 4 | 20.000 Company Seals | ✔️ | Grand Company Quartermaster |
| Sacred Spring Water | 4 | 800 Poetics | ❌ (Only available after step 7) | Auriana |
| Mahatma | 1 | 50 Poetics | ❌(One at a time) | Remon |
Quests
1 - A Relic Reborn
The chain starts with one of the job specific quests from A relic Reborn given by Gerolt Blackthorn in North Shroud.
There is one quest for each job and each of them will have their specifics.
Instanced content must be done with the job you picked the quest for but can be done unsync and solo.
Steps
Overview
- Talk to Gerolt on the job you want to start the quest for. He'll give you a specific location depending on the job. Go there and bring back the broken weapon.
- Obtain and deliver a specific materia-enhanced weapon (with 2 materia). The weapon and materia needed are detailed in the job tabs.
ℹ️ Note
This is a crafted item, so you can either make one yourself with a special material drop from specific level 50 dungeons, or purchase it off the marketboard. There are vendors that are able to add materia to the weapon if your crafting level is too low. - Complete the trial A Relic Reborn: The Chimera on the job you are doing the relic.
- Talk to Rowena and complete Amdapor Keep.
- Slay 3 different sets of 8 mobs in the area you had to fetch the 'Timeworn' version of your weapon from (Details on each job below) .
- Complete the trial A Relic Reborn: The Hydra (With relic weapon equipped).
- Complete the trial The Bowl of Embers (Hard).
- Complete the trial The Howling Eye (Hard) .
- Complete the trial The Navel (Hard).
- Purchase Radz-at-Han Quenching Oil and deliver it to Gerolt to receive the finalised first step.
Jobs (click to expand)
PLD
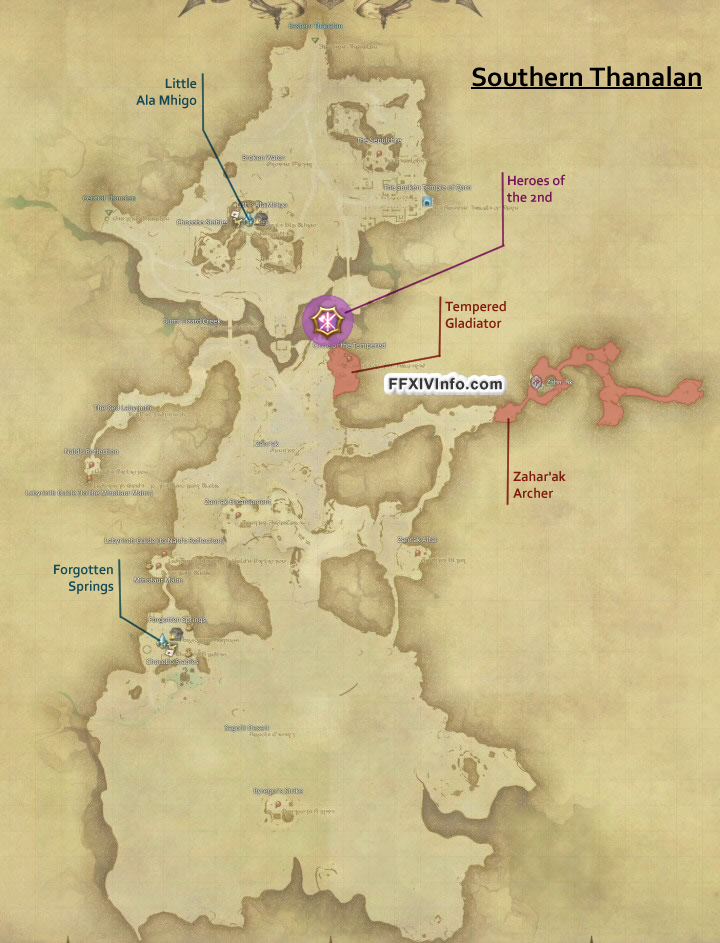
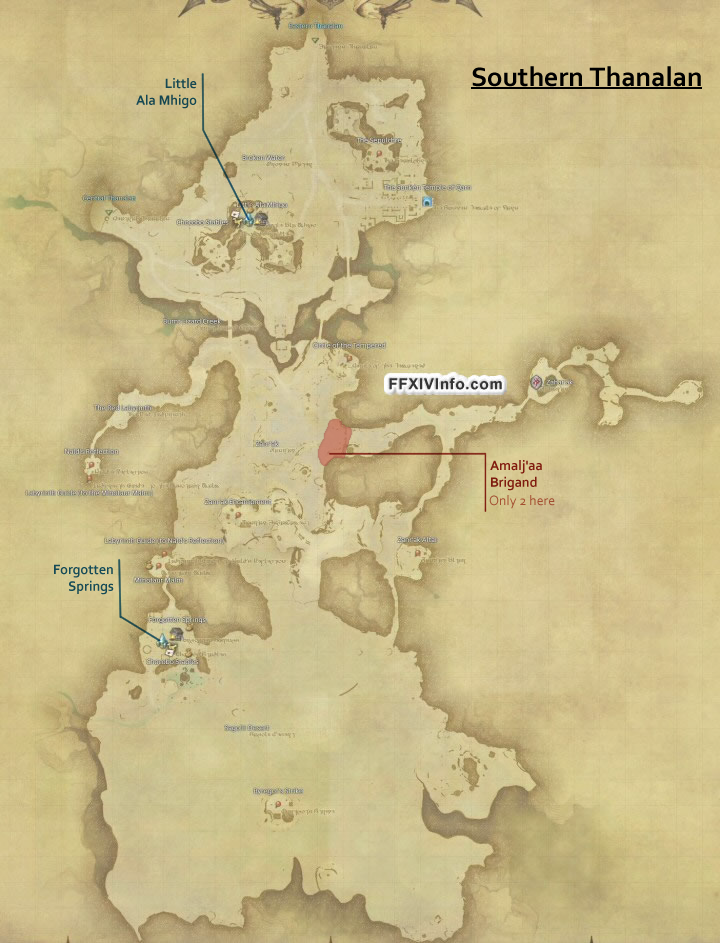
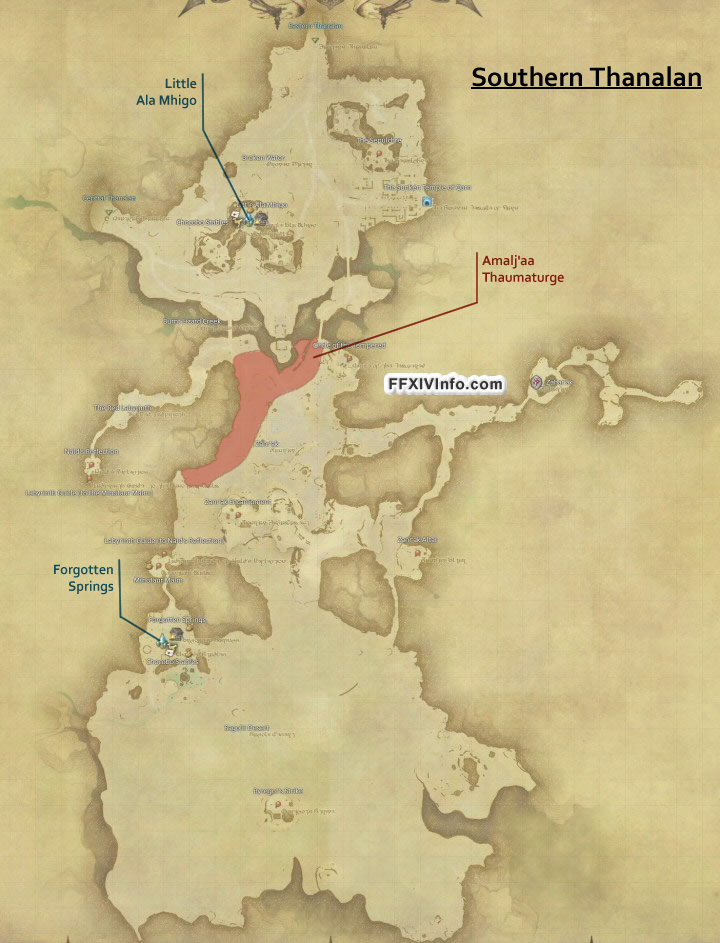
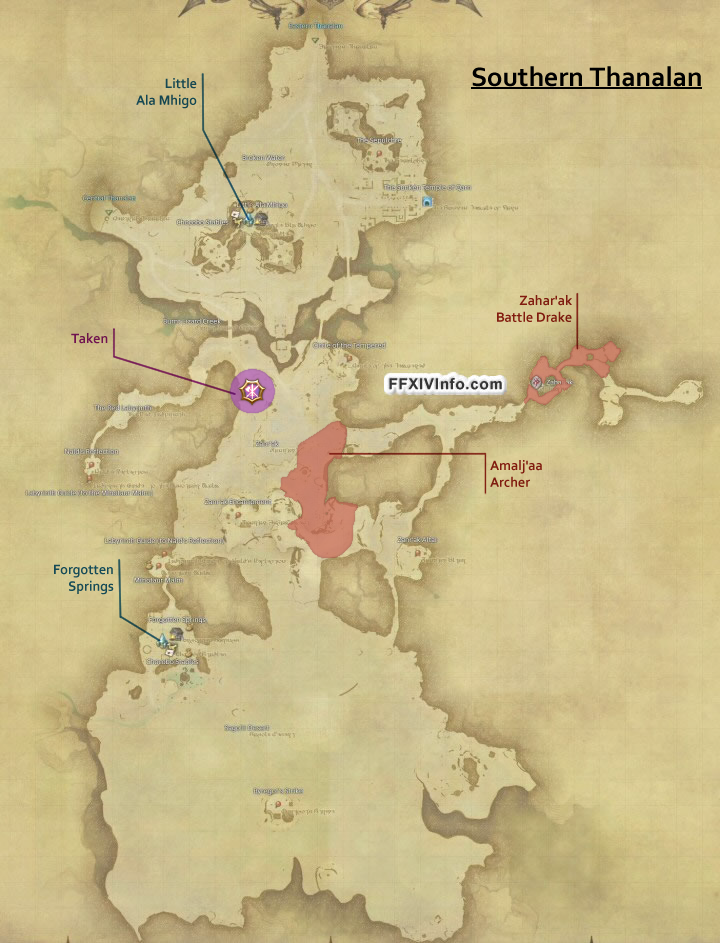
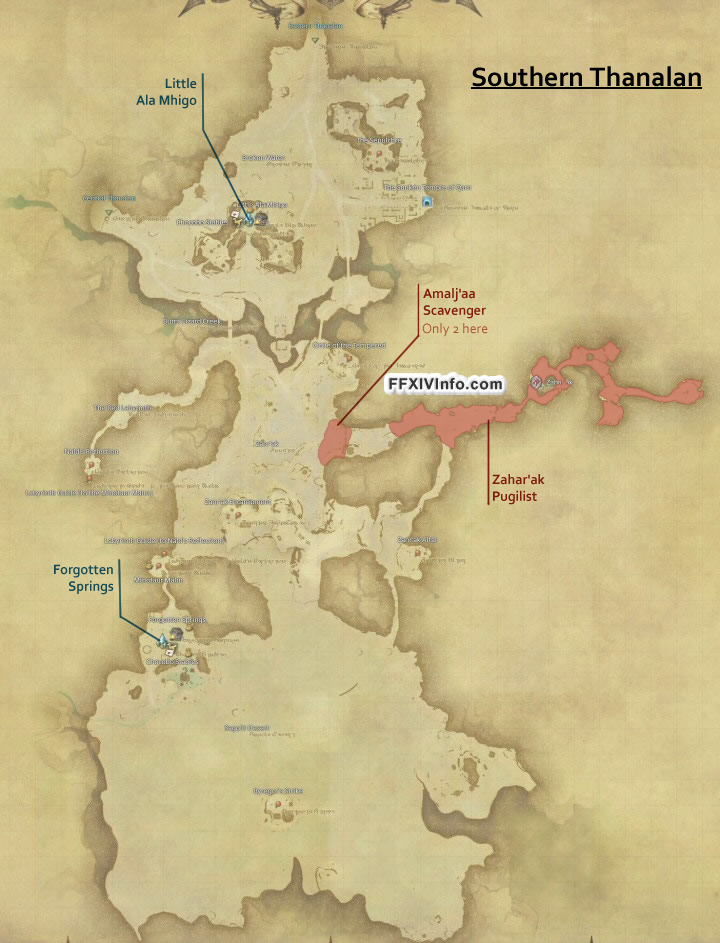
- First, travel to Zahar'ak in Southern Thanalan to retrieve the Timeworn Curtana. Deliver it to Gerolt .
- Next, you need an
 Aeolian Scimitar enhanced with 2
  Battledance Materia III.
 - Now travel to The Weeping Saint in Coerthas Central Highlands and examine the destination. Then use the Duty Finder to complete A Relic Reborn: The Chimera. Deliver the Alumina Salts to Gerolt.
- Speak with Rowena in Mor Dhona, then complete Amdapor Keep to receive an Amdapor Glyph to trade to Rowena. Return to Gerolt with the text she gave you. You will receive an
 Unfinished Curtana that you can equip.
 - Return to Southern Thanalan and equip your unfinished weapon. Kill 8 each of Zahar'ak Lancers, Zahar'ak Pugilists, and Zahar'ak Thaumaturges, which are around the area you first found your Timeworn relic. Speak with Gerolt again.
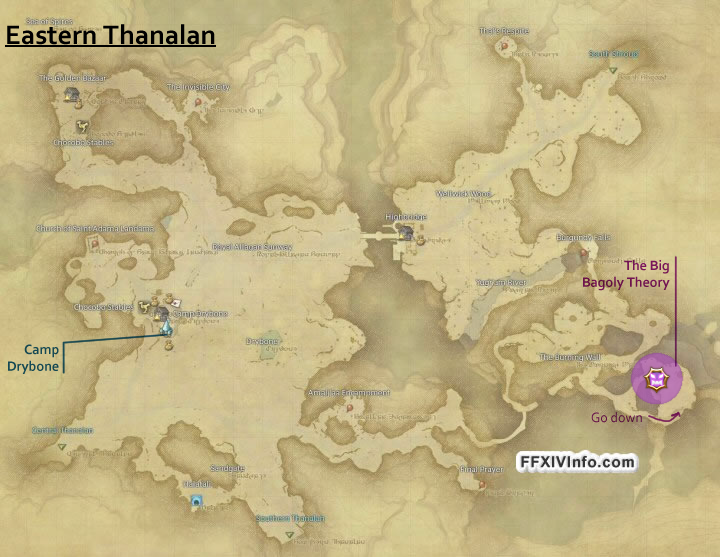
- Now travel to the entrance to Halatali in Eastern Thanalan and examine the destination. Then use the Duty Finder to complete A Relic Reborn: The Hydra. You must have the unfinished weapon equipped. Speak with Gerolt yet again and turn over your unfinished weapon.
- Complete The Bowl of Embers (Hard) to retrieve a White-hot Ember.
- Complete The Howling Eye (Hard) to retrieve a Howling Gale.
- Complete The Navel (Hard) to retrieve a Hyperfused Ore.
- Purchase 1
 Radz-at-Han Quenching Oil from Auriana in Mor Dhona and return to Gerolt one final time to receive your
  Curtana and
  Holy Shield.
WAR
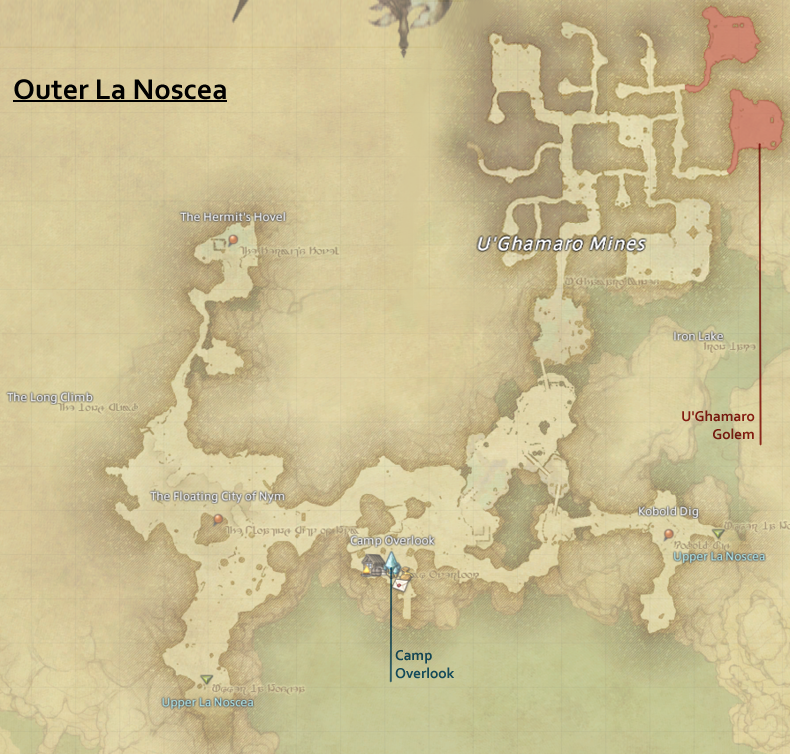
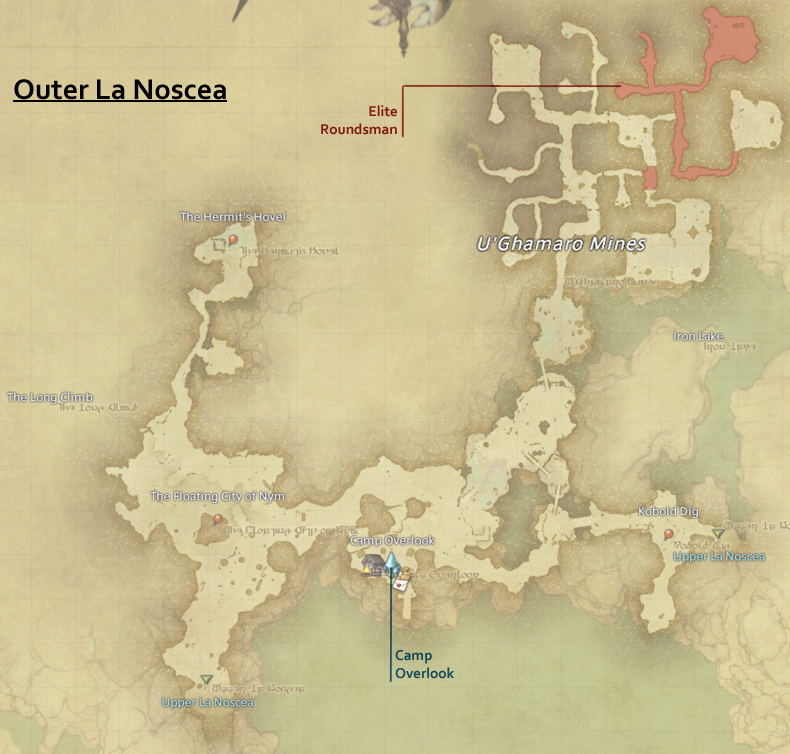
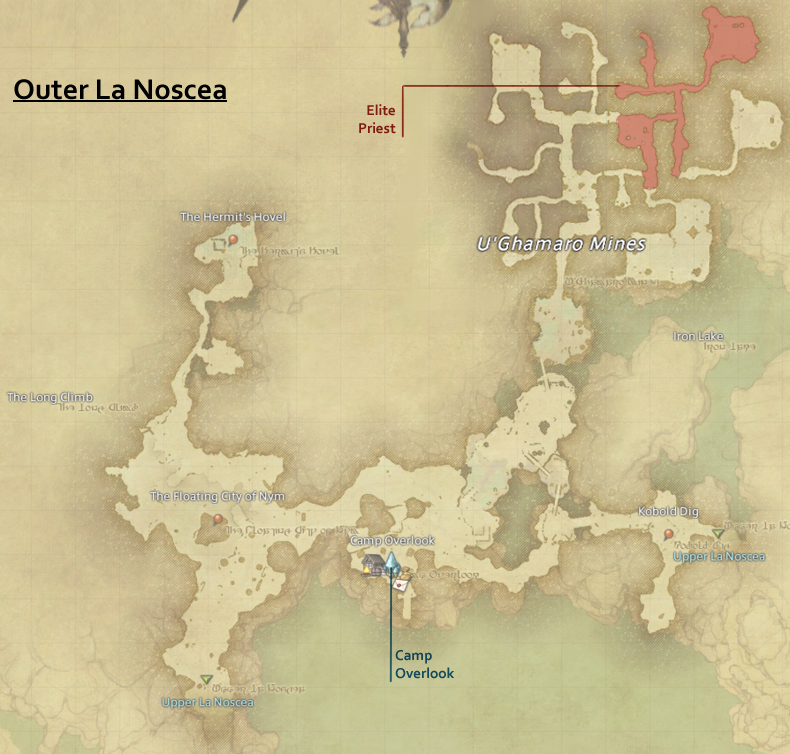
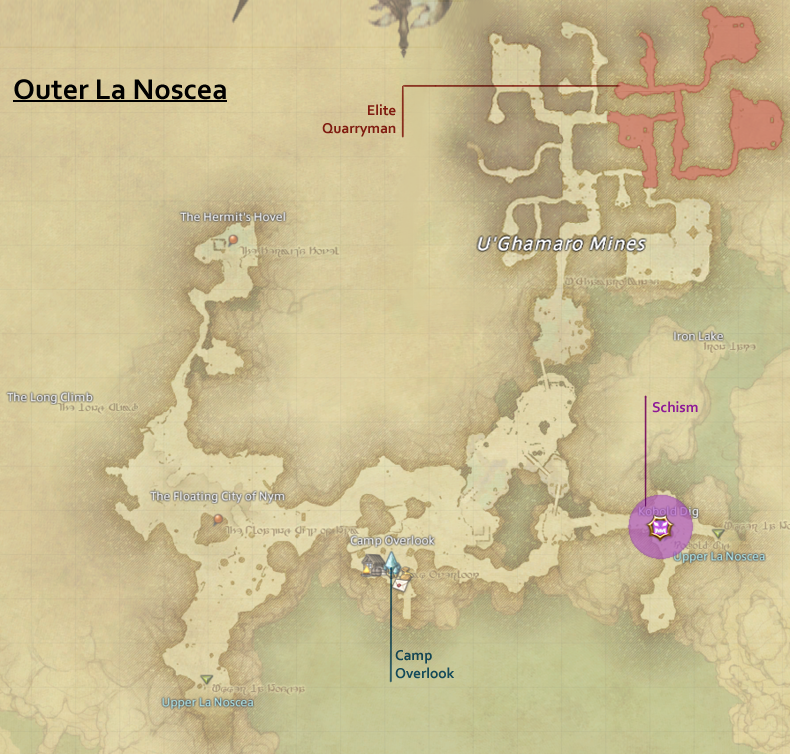
- First, travel to U'Ghamaro Mines in Outer La Noscea to retrieve the Timeworn Bravura. Deliver it to Gerolt.
- Next, you need an
 Barbarian's Bardiche enhanced with 2 Battledance Materia III.
 - Now travel to The Weeping Saint in Coerthas Central Highlands and examine the destination. Then use the Duty Finder to complete A Relic Reborn: The Chimera. Deliver the Alumina Salts to Gerolt.
- Speak with Rowena in Mor Dhona, then complete Amdapor Keep to receive an Amdapor Glyph to trade to Rowena. Return to Gerolt with the text she gave you. You will receive an
 Unfinished Bravura that you can equip.
 - Return to Outer La Noscea and equip your unfinished weapon. Kill 8 each of U'Ghamaro Quarryman, U'Ghamaro Roundsman, and U'Ghamaro Bedesman, which are around the area you first found your Timeworn relic. Speak with Gerolt again.
- Now travel to the entrance to Halatali in Eastern Thanalan and examine the destination. Then use the Duty Finder to complete A Relic Reborn: The Hydra. You must have the unfinished weapon equipped. Speak with Gerolt yet again and turn over your unfinished weapon.
- Complete The Bowl of Embers (Hard) to retrieve a White-hot Ember.
- Complete The Howling Eye (Hard) to retrieve a Howling Gale.
- Complete The Navel (Hard) to retrieve a Hyperfused Ore.
- Purchase 1 Radz-at-Han Quenching Oil from Auriana in Mor Dhona and return to Gerolt one final time to receive your
 Bravura.
WHM
- First, travel to U'Ghamaro Mines in Outer La Noscea to retrieve the Timeworn Thyrus. Deliver it to Gerolt.
- Next, you need an
 Madman's Whispering Rod enhanced with 2
  Quicktongue Materia III.
 - Now travel to The Weeping Saint in Coerthas Central Highlands and examine the destination. Then use the Duty Finder to complete A Relic Reborn: The Chimera. Deliver the Alumina Salts to Gerolt.
- Speak with Rowena in Mor Dhona, then complete Amdapor Keep to receive an Amdapor Glyph to trade to Rowena. Return to Gerolt with the text she gave you. You will receive an
 Unfinished Thyrus that you can equip.
 - Return to Outer La Noscea and equip your unfinished weapon. Kill 8 each of U'Ghamaro Quarryman, U'Ghamaro Priests, and U'Ghamaro Bedesman, which are around the area you first found your Timeworn relic. Speak with Gerolt again.
- Now travel to the entrance to Halatali in Eastern Thanalan and examine the destination. Then use the Duty Finder to complete A Relic Reborn: The Hydra. You must have the unfinished weapon equipped. Speak with Gerolt yet again and turn over your unfinished weapon.
- Complete The Bowl of Embers (Hard) to retrieve a White-hot Ember.
- Complete The Howling Eye (Hard) to retrieve a Howling Gale.
- Complete The Navel (Hard) to retrieve a Hyperfused Ore.
- Purchase 1 Radz-at-Han Quenching Oil from Auriana in Mor Dhona and return to Gerolt one final time to receive your
 Thyrus.
SCH
- First, travel to Sapsa Spawning Grounds in Western La Noscea to retrieve the Timeworn Omnilex. Deliver it to Gerolt.
- Next, you need an
 Erudite's Picatrix of Healing enhanced with 2 Quicktongue Materia III.
 - Now travel to The Weeping Saint in Coerthas Central Highlands and examine the destination. Then use the Duty Finder to complete A Relic Reborn: The Chimera. Deliver the Alumina Salts to Gerolt.
- Speak with Rowena in Mor Dhona, then complete Amdapor Keep to receive an Amdapor Glyph to trade to Rowena. Return to Gerolt with the text she gave you. You will receive an
 Unfinished Omnilex that you can equip.
 - Return to Western La Noscea and equip your unfinished weapon. Kill 8 each of Sapsa Shelfspines, Sapsa Shelfclaws, and Sapsa Shelftooth, which are around the area you first found your Timeworn relic. Speak with Gerolt again.
- Now travel to the entrance to Halatali in Eastern Thanalan and examine the destination. Then use the Duty Finder to complete A Relic Reborn: The Hydra. You must have the unfinished weapon equipped. Speak with Gerolt yet again and turn over your unfinished weapon.
- Complete The Bowl of Embers (Hard) to retrieve a White-hot Ember.
- Complete The Howling Eye (Hard) to retrieve a Howling Gale.
- Complete The Navel (Hard) to retrieve a Hyperfused Ore.
- Purchase 1 Radz-at-Han Quenching Oil from Auriana in Mor Dhona and return to Gerolt one final time to receive your
 Omnilex.
MNK
- First, travel to Zahar'ak in Southern Thanalan to retrieve the Timeworn Sphairai. Deliver it to Gerolt.
- Next, you need an
 Wildling's Cesti enhanced with 2
  Savage Aim Materia III.
 - Now travel to The Weeping Saint in Coerthas Central Highlands and examine the destination. Then use the Duty Finder to complete A Relic Reborn: The Chimera. Deliver the Alumina Salts to Gerolt.
- Speak with Rowena in Mor Dhona, then complete Amdapor Keep to receive an Amdapor Glyph to trade to Rowena. Return to Gerolt with the text she gave you. You will receive an
 Unfinished Sphairai that you can equip.
 - Return to Southern Thanalan and equip your unfinished weapon. Kill 8 each of Zahar'ak Lancers, Zahar'ak Pugilists, and Zahar'ak Archers, which are around the area you first found your Timeworn relic. Speak with Gerolt again.
- Now travel to the entrance to Halatali in Eastern Thanalan and examine the destination. Then use the Duty Finder to complete A Relic Reborn: The Hydra. You must have the unfinished weapon equipped. Speak with Gerolt yet again and turn over your unfinished weapon.
- Complete The Bowl of Embers (Hard) to retrieve a White-hot Ember .
- Complete The Howling Eye (Hard) to retrieve a Howling Gale .
- Complete The Navel (Hard) to retrieve a Hyperfused Ore .
- Purchase 1 Radz-at-Han Quenching Oil from Auriana in Mor Dhona and return to Gerolt one final time to receive your
 Sphairai.
DRG
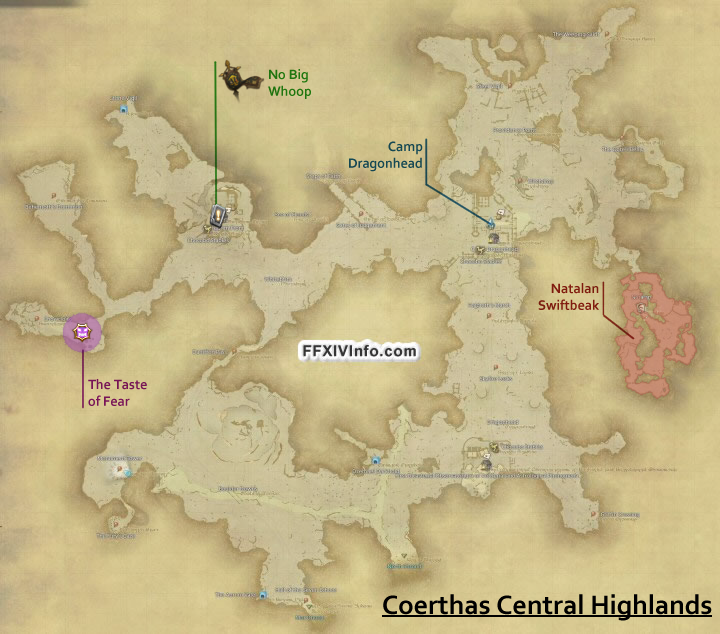
- First, travel to Natalan in Coerthas Central Highlands to retrieve the Timeworn Gae Bolg. Deliver it to Gerolt.
- Next, you need an
 Champion's Lance enhanced with 2 Savage Aim Materia III.
 - Now travel to The Weeping Saint in Coerthas Central Highlands and examine the destination. Then use the Duty Finder to complete A Relic Reborn: The Chimera. Deliver the Alumina Salts to Gerolt.
- Speak with Rowena in Mor Dhona, then complete Amdapor Keep to receive an Amdapor Glyph to trade to Rowena. Return to Gerolt with the text she gave you. You will receive an
 Unfinished Gae Bolg that you can equip.
 - Return to Coerthas Central Highlands and equip your unfinished weapon. Kill 8 each of Natalan Boldwings, Natalan Fogcallers, and Natalan Swiftbeaks, which are around the area you first found your Timeworn relic. Speak with Gerolt again.
- Now travel to the entrance to Halatali in Eastern Thanalan and examine the destination. Then use the Duty Finder to complete A Relic Reborn: The Hydra. You must have the unfinished weapon equipped. Speak with Gerolt yet again and turn over your unfinished weapon.
- Complete The Bowl of Embers (Hard) to retrieve a White-hot Ember.
- Complete The Howling Eye (Hard) to retrieve a Howling Gale.
- Complete The Navel (Hard) to retrieve a Hyperfused Ore.
- Purchase 1 Radz-at-Han Quenching Oil from Auriana in Mor Dhona and return to Gerolt one final time to receive your
 Gae Bolg.
NIN
- First, travel to Sapsa Spawning Grounds in Western La Noscea to retrieve the Timeworn Yoshimitsu. Deliver it to Gerolt.
- Next, you need an
 Vamper's Knives enhanced with 2
  Heavens' Eye Materia III.
 - Now travel to The Weeping Saint in Coerthas Central Highlands and examine the destination. Then use the Duty Finder to complete A Relic Reborn: The Chimera. Deliver the Alumina Salts to Gerolt.
- Speak with Rowena in Mor Dhona, then complete Amdapor Keep to receive an Amdapor Glyph to trade to Rowena. Return to Gerolt with the text she gave you. You will receive an
 Unfinished Yoshimitsu that you can equip.
 - Return to Western La Noscea and equip your unfinished weapon. Kill 8 each of Sapsa Shelfspines, Sapsa Shelfclaws, and Sapsa Shelftooth, which are around the area you first found your Timeworn relic. Speak with Gerolt again.
- Now travel to the entrance to Halatali in Eastern Thanalan and examine the destination. Then use the Duty Finder to complete A Relic Reborn: The Hydra. You must have the unfinished weapon equipped. Speak with Gerolt yet again and turn over your unfinished weapon.
- Complete The Bowl of Embers (Hard) to retrieve a White-hot Ember.
- Complete The Howling Eye (Hard) to retrieve a Howling Gale.
- Complete The Navel (Hard) to retrieve a Hyperfused Ore.
- Purchase 1 Radz-at-Han Quenching Oil from Auriana in Mor Dhona and return to Gerolt one final time to receive your
 Yoshimitsu.
BRD
- First, travel to Natalan in Coerthas Central Highlands to retrieve the Timeworn Artemis Bow. Deliver it to Gerolt.
- Next, you need an
 Longarm's Composite Bow enhanced with 2 Heavens' Eye Materia III.
 - Now travel to The Weeping Saint in Coerthas Central Highlands and examine the destination. Then use the Duty Finder to complete A Relic Reborn: The Chimera. Deliver the Alumina Salts to Gerolt.
- Speak with Rowena in Mor Dhona, then complete Amdapor Keep to receive an Amdapor Glyph to trade to Rowena. Return to Gerolt with the text she gave you. You will receive an
 Unfinished Artemis Bow that you can equip.
 - Return to Coerthas Central Highlands and equip your unfinished weapon. Kill 8 each of Natalan Boldwings, Natalan Fogcallers, and Natalan Windtalons, which are around the area you first found your Timeworn relic. Speak with Gerolt again.
- Now travel to the entrance to Halatali in Eastern Thanalan and examine the destination. Then use the Duty Finder to complete A Relic Reborn: The Hydra. You must have the unfinished weapon equipped. Speak with Gerolt yet again and turn over your unfinished weapon.
- Complete The Bowl of Embers (Hard) to retrieve a White-hot Ember.
- Complete The Howling Eye (Hard) to retrieve a Howling Gale.
- Complete The Navel (Hard) to retrieve a Hyperfused Ore.
- Purchase 1 Radz-at-Han Quenching Oil from Auriana in Mor Dhona and return to Gerolt one final time to receive your
 Artemis Bow.
BLM
- First, travel to U'Ghamaro Mines in Outer La Noscea to retrieve the Timeworn Stardust Rod. Deliver it to Gerolt.
- Next, you need an
 Sanguine Scepter enhanced with 2
  Savage Might Materia III.
 - Now travel to The Weeping Saint in Coerthas Central Highlands and examine the destination. Then use the Duty Finder to complete A Relic Reborn: The Chimera. Deliver the Alumina Salts to Gerolt.
- Speak with Rowena in Mor Dhona, then complete Amdapor Keep to receive an Amdapor Glyph to trade to Rowena. Return to Gerolt with the text she gave you. You will receive an
 Unfinished Stardust Rod that you can equip.
 - Return to Outer La Noscea and equip your unfinished weapon. Kill 8 each of U'Ghamaro Quarryman, U'Ghamaro Priests, and U'Ghamaro Bedesman, which are around the area you first found your Timeworn relic. Speak with Gerolt again.
- Now travel to the entrance to Halatali in Eastern Thanalan and examine the destination. Then use the Duty Finder to complete A Relic Reborn: The Hydra. You must have the unfinished weapon equipped. Speak with Gerolt yet again and turn over your unfinished weapon.
- Complete The Bowl of Embers (Hard) to retrieve a White-hot Ember.
- Complete The Howling Eye (Hard) to retrieve a Howling Gale.
- Complete The Navel (Hard) to retrieve a Hyperfused Ore.
- Purchase 1 Radz-at-Han Quenching Oil from Auriana in Mor Dhona and return to Gerolt one final time to receive your
 Stardust Rod.
SMN
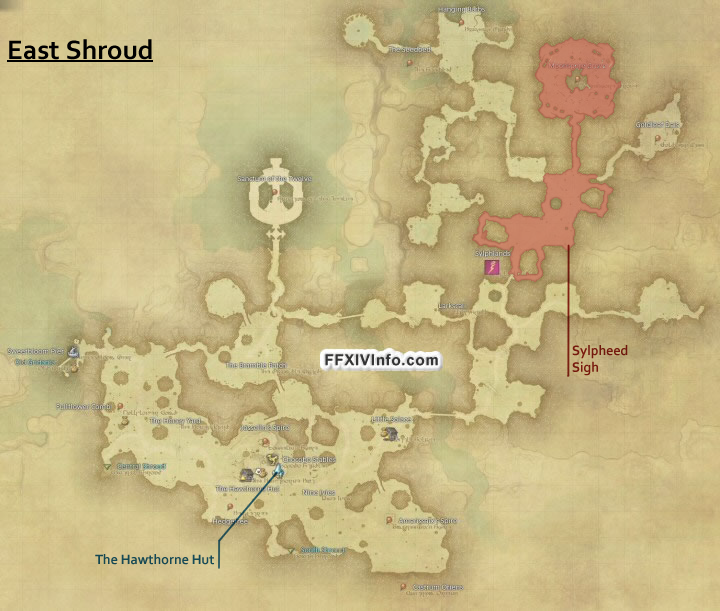
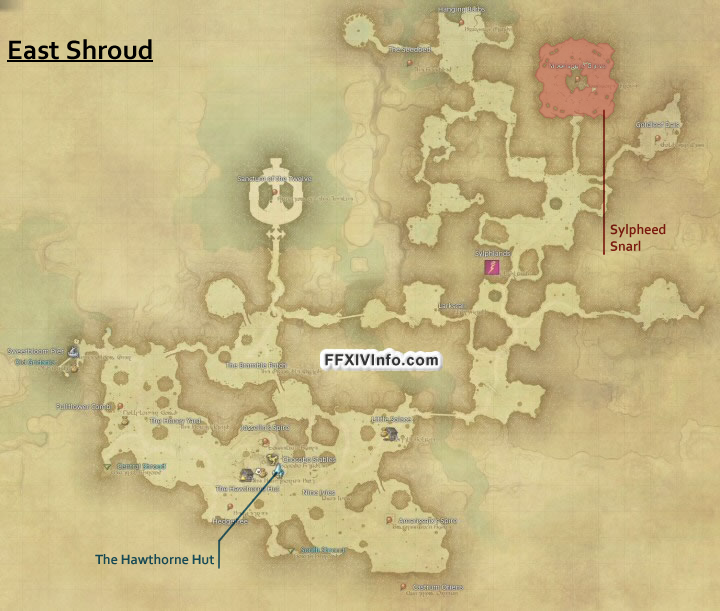
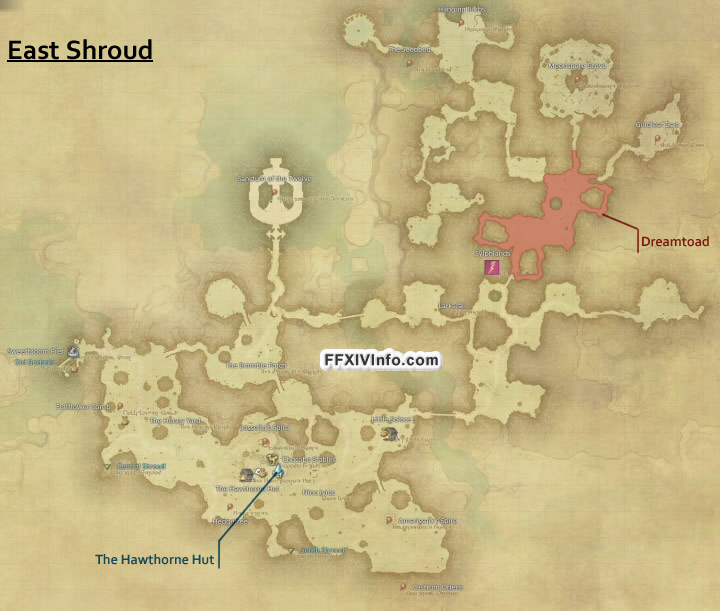
- First, travel to the Sylphlands in East Shroud to retrieve the Timeworn Veil of Wiyu. Deliver it to Gerolt.
- Next, you need an
 Erudite's Picatrix of Casting enhanced with 2 Savage Might Materia III.
 - Now travel to The Weeping Saint in Coerthas Central Highlands and examine the destination. Then use the Duty Finder to complete A Relic Reborn: The Chimera. Deliver the Alumina Salts to Gerolt.
- Speak with Rowena in Mor Dhona, then complete Amdapor Keep to receive an Amdapor Glyph to trade to Rowena. Return to Gerolt with the text she gave you. You will receive an
 Unfinished Veil of Wiyu that you can equip.
 - Return to East Shroud and equip your unfinished weapon. Kill 8 each of Sylpheed Snarls, Sylpheed Sighs, and Sylpheed Screeches, which are around the area you first found your Timeworn relic. Speak with Gerolt again.
- Now travel to the entrance to Halatali in Eastern Thanalan and examine the destination. Then use the Duty Finder to complete A Relic Reborn: The Hydra. You must have the unfinished weapon equipped. Speak with Gerolt yet again and turn over your unfinished weapon.
- Complete The Bowl of Embers (Hard) to retrieve a White-hot Ember.
- Complete The Howling Eye (Hard) to retrieve a Howling Gale.
- Complete The Navel (Hard) to retrieve a Hyperfused Ore.
- Purchase 1 Radz-at-Han Quenching Oil from Auriana in Mor Dhona and return to Gerolt one final time to receive your
 The Veil of Wiyu.
2 - Zenith
This one is a quick step.
All that is required is that you purchase the 3 Thavnairian Mist from any Rowena's Representative NPC and trade them to the Furnace together with the Relic from the previous step.
3 - Atma
✅ One Time Quest!
The quest Up in Arms only needs to be completed once.
Afterwards you will have unlocked the ability to farm Atma Crystals anytime you are wearing a Zenith relic (not a replica).
🔥 Multiple Relics
If you are planning on doing more than one or even all of the relics, you can farm the Atma Crystals all in one go!
This step requires that you complete FATEs to receive Atma Crystals .
The FATEs are irrelevant and the drops are random chance, the only requirement is that you need a Zenith weapon equipped.
Zones
- The Black Shroud
- Thanalan
- La Noscea
After you are done with collecting all 12 Atma return to Jalzahn and select Relic Weapon Zenith Enhancement .
You must have your weapon in your inventory or armory (not equipped).
4 - Animus
This step will require quite a bit of grinding to complete.
You will have to complete the quest Trials of the Braves.
Afterwards, you will be able to purchase the books necessary from G'jusana.
These will need to be completed one at a time.
Do not forget to equip your Atma relic weapon!
ℹ️ Important
Some FATEs will only spawn once their prerequisite chain FATE is completed.
Check the links below on the book section for details on the fates.
Preparations
To start off, ensure that you have unlocked access to the following dungeons:
| Dungeon | Quest |
|---|---|
| The Lost City of Amdapor | One Night in Amdapor |
| The Wanderer’s Palace | Trauma Queen |
| Copperbell Mines (Hard) | Out of Sight, Out of Mine |
| The Sunken Temple of Qarn | Braving New Depths |
| Haukke Manor (Hard) | Maniac Manor |
| Halatali (Hard) | This Time’s for Fun |
| Dzemael Darkhold | Fort of Fear |
| Brayflox’s Longstop (Hard) | Curds and Slay |
| Cutter’s Cry | Dishonor Before Death |
| Pharos Sirius | Sirius Business |
| The Aurum Vale | Going for Gold |
Book Info
Expand the blocks below to see each of the books' information.
There are also collapsed Maps categories where you can see all the locations overlaid on the game map.
Each book contains:
- 10 monsters that need to be slain (3 each)
- 3 dungeons to complete (can be done un-sync and solo)
- 3 FATEs to complete
- 3 Levequests to complete
The Books of Fire
Book of Skyfire I
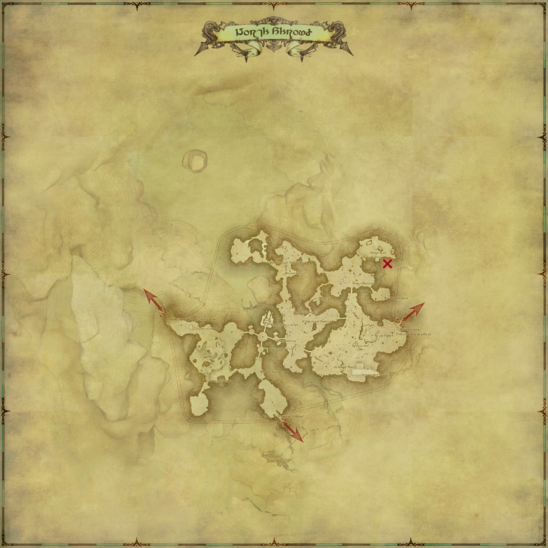
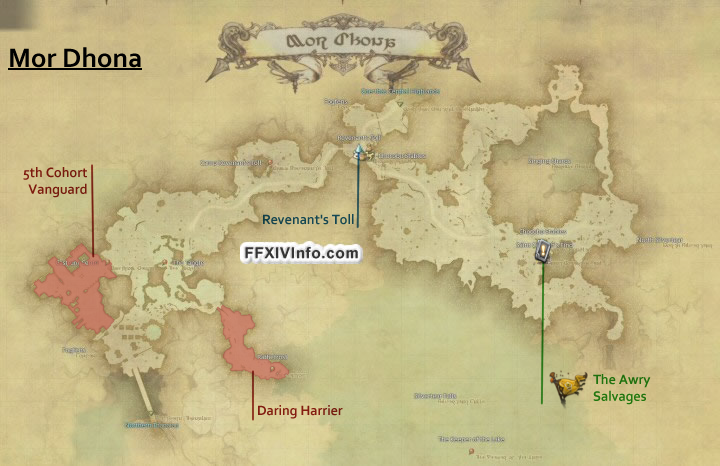
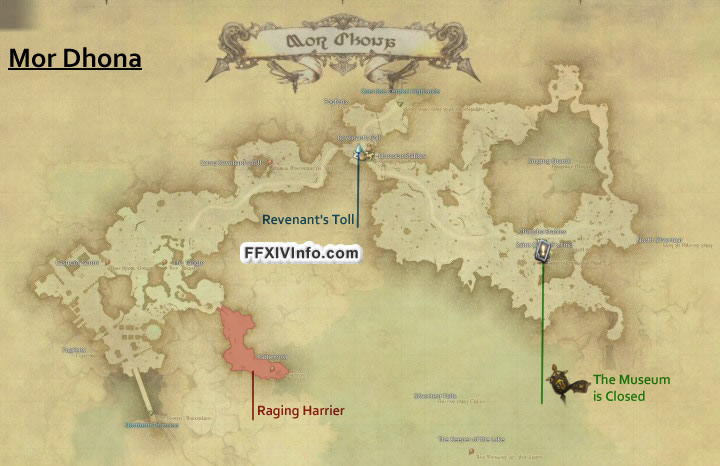
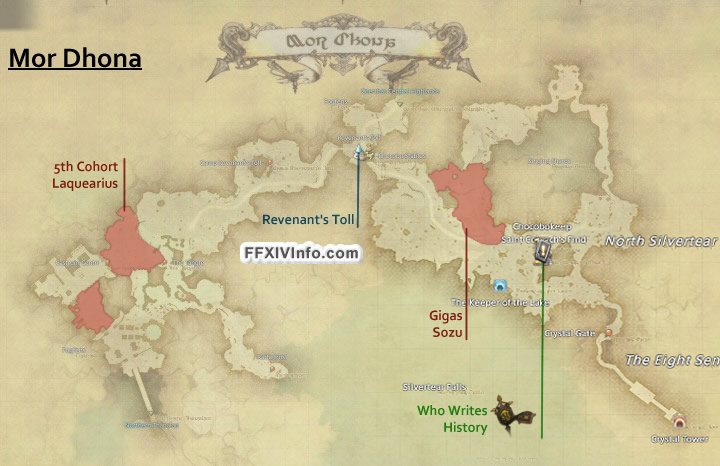
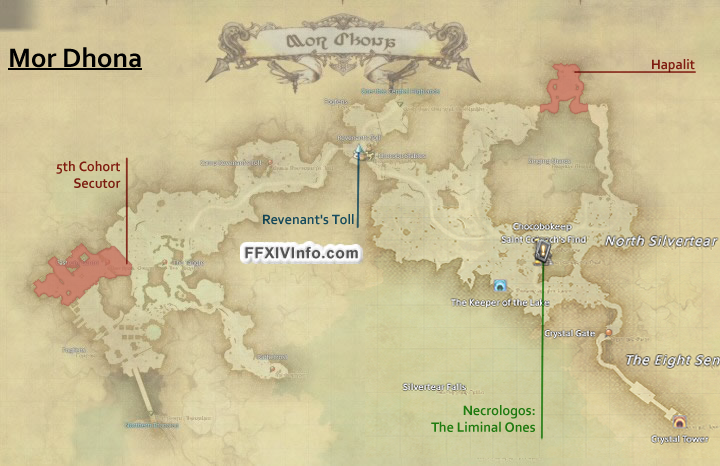
Enemies- Daring Harrier x3 - Mor Dhona
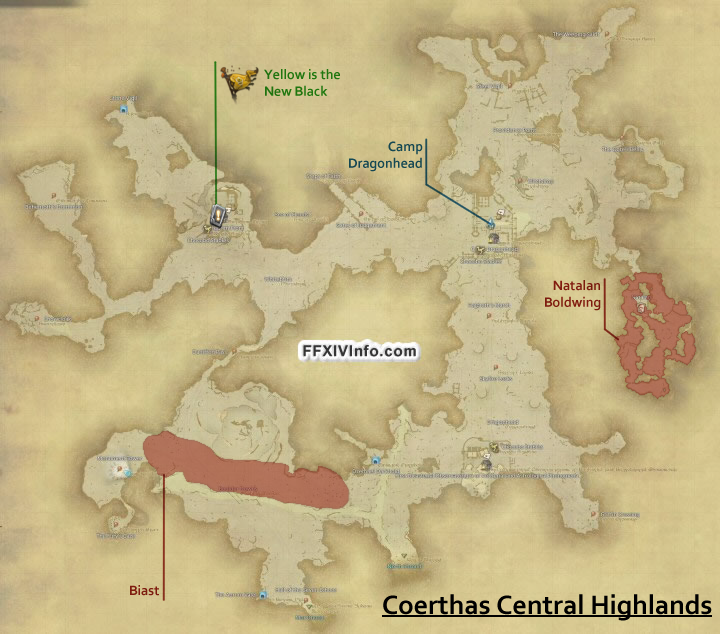
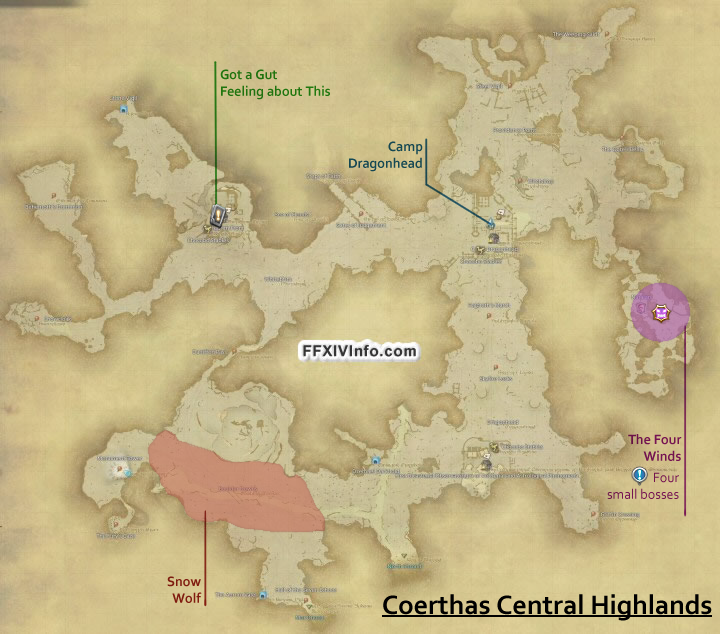
- Giant Logger x3 - Coerthas Central Highlands
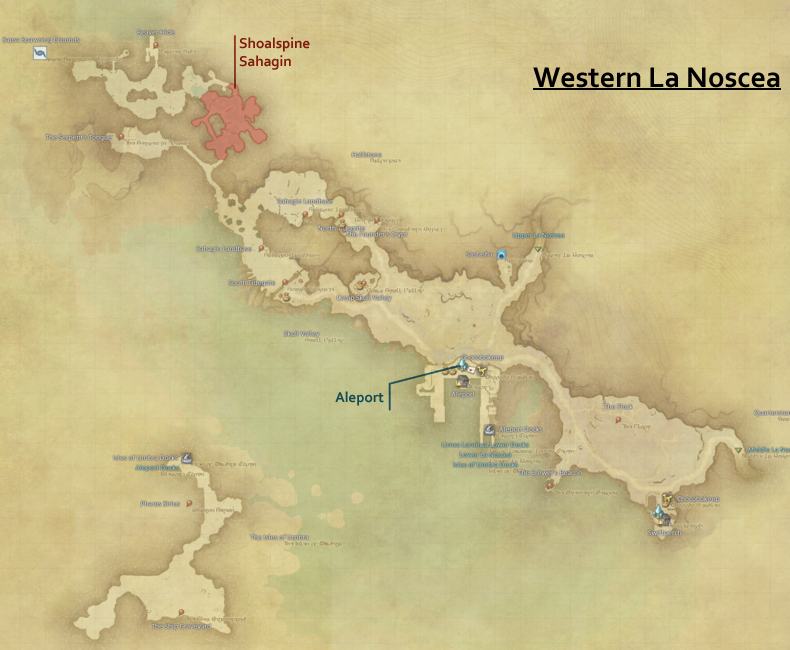
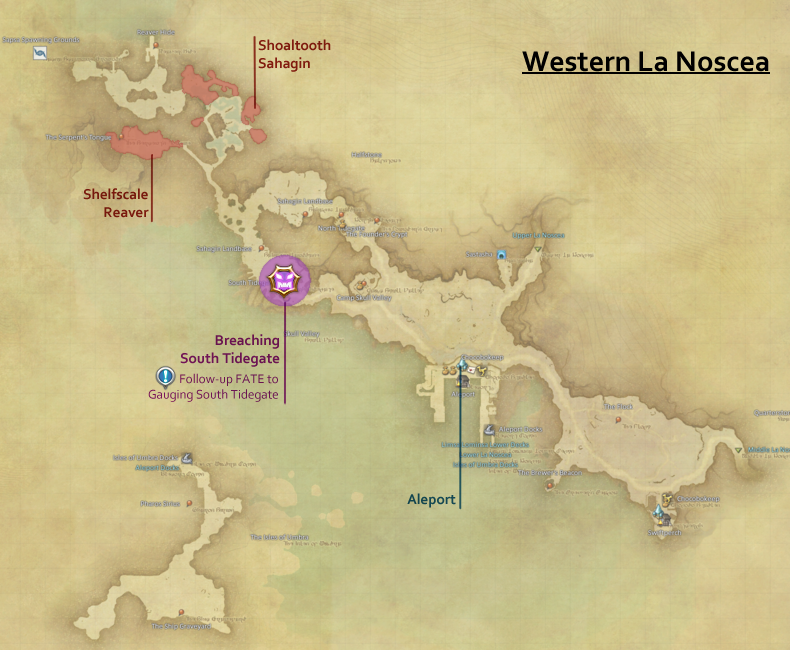
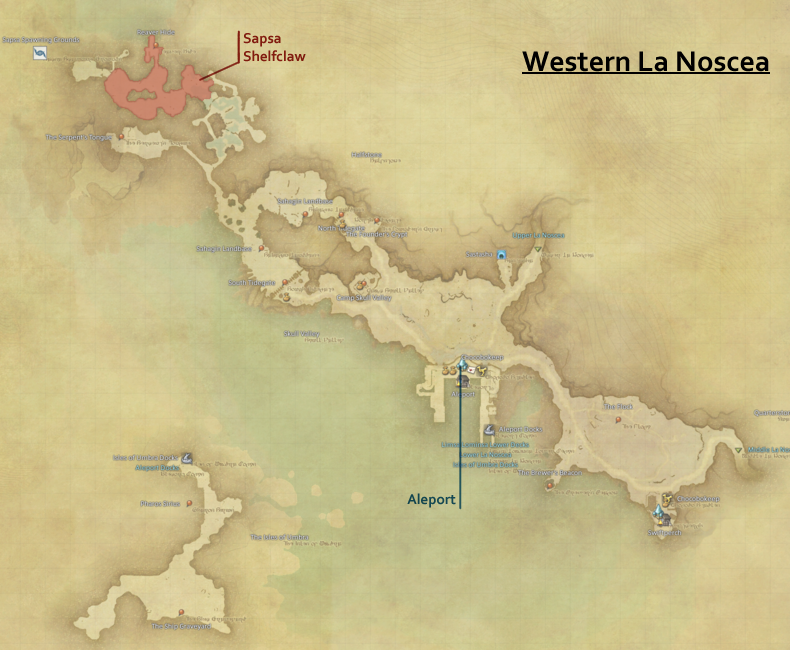
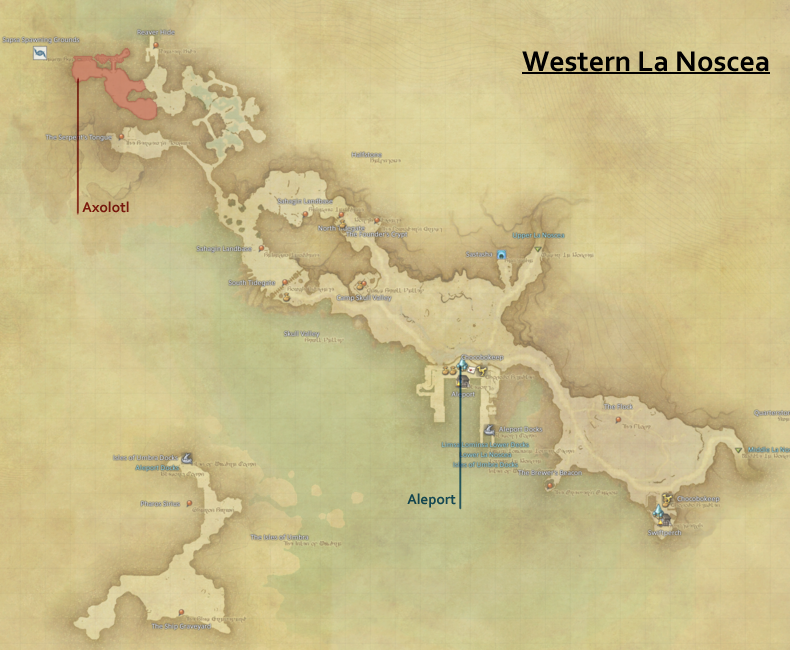
- Shoalspine Sahagin x3 - Western La Noscea
- 5th Cohort Vanguard x3 - Mor Dhona
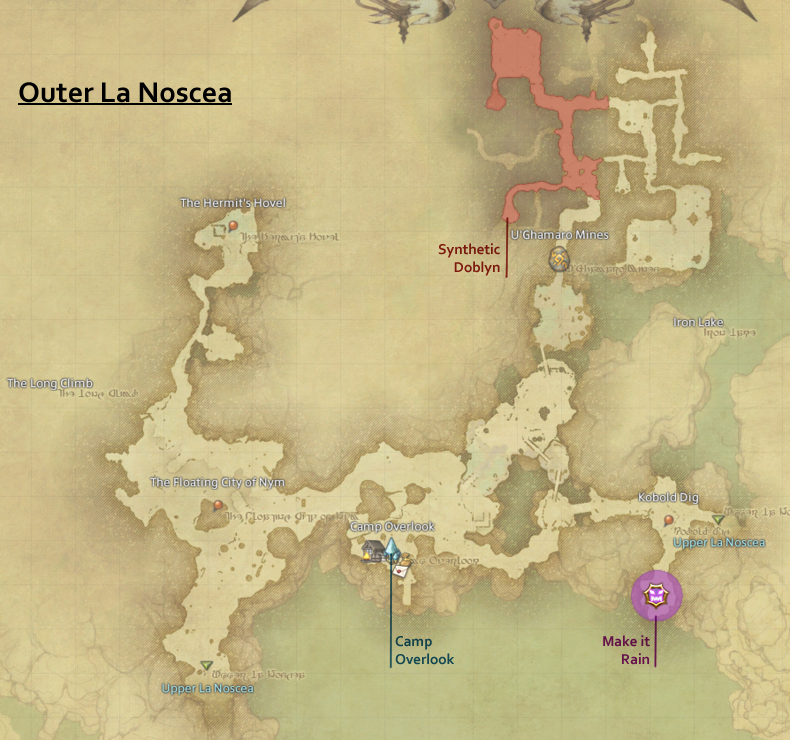
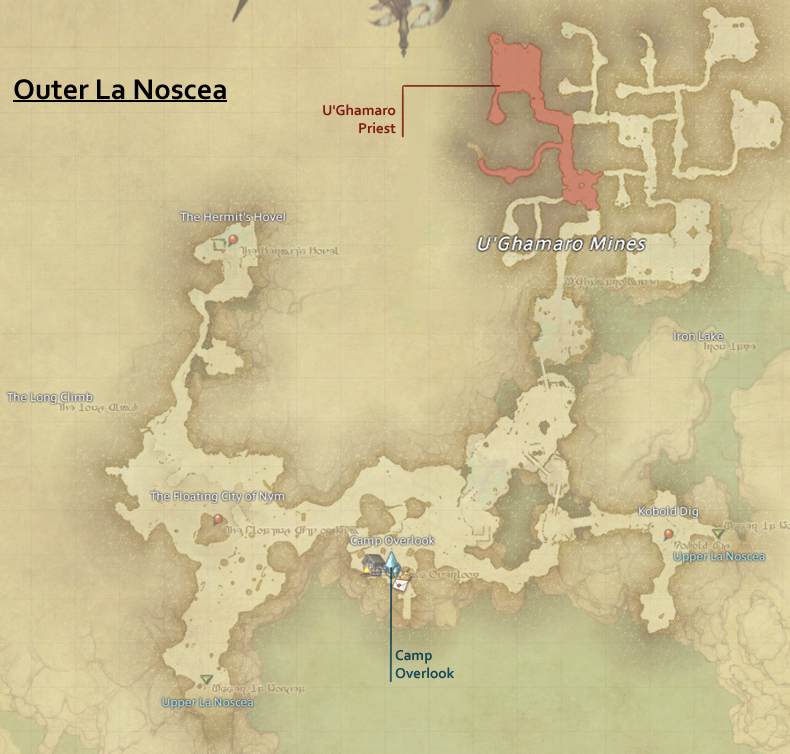
- Synthetic Doblyn x3- Outer La Noscea
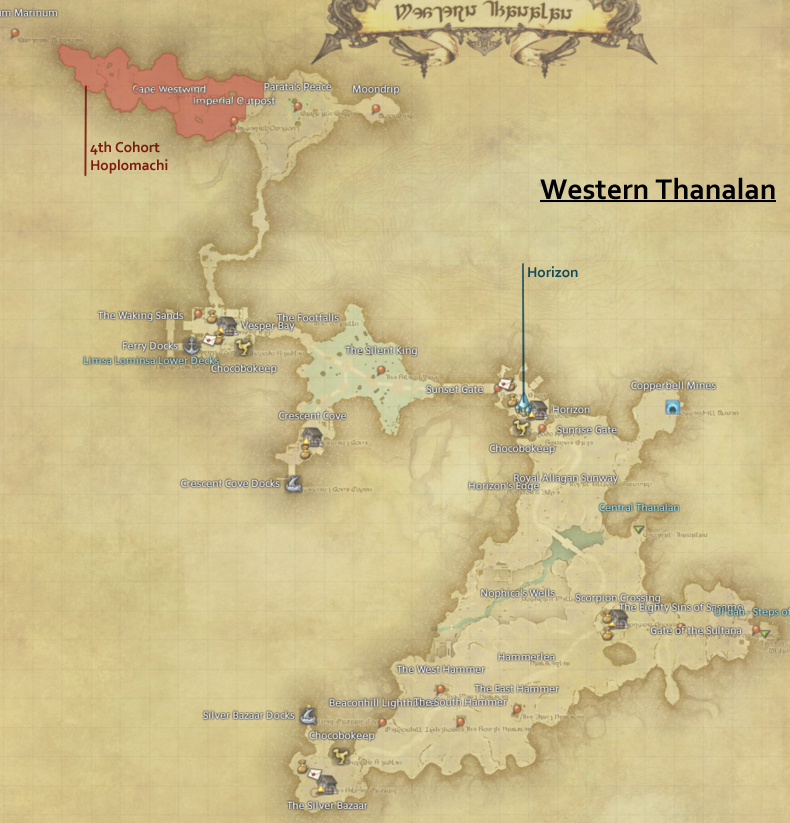
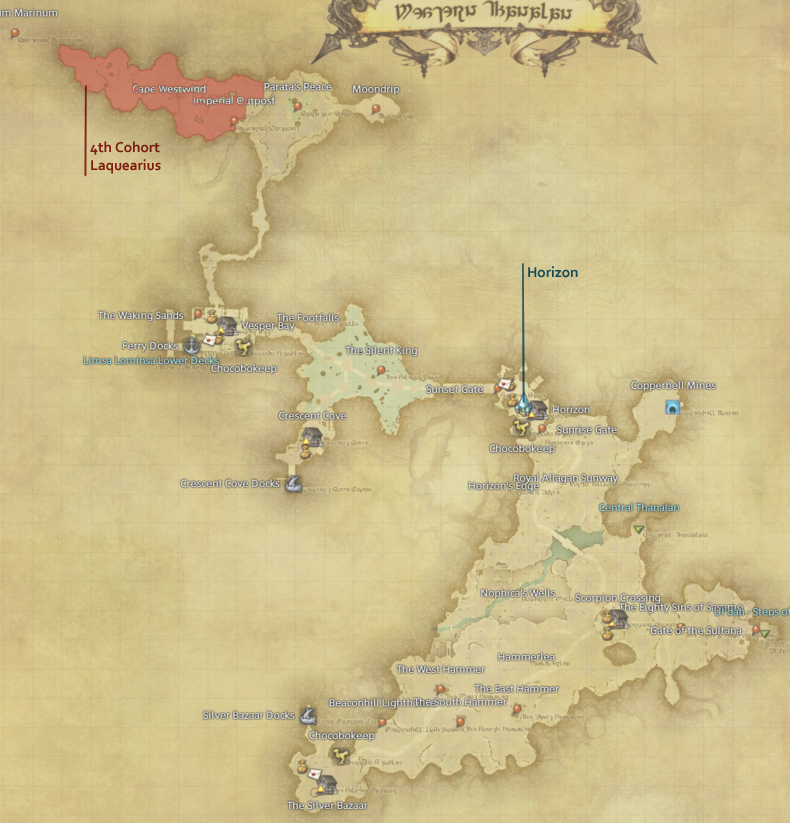
- 4th Cohort Hoplomachus x3 - Western Thanalan
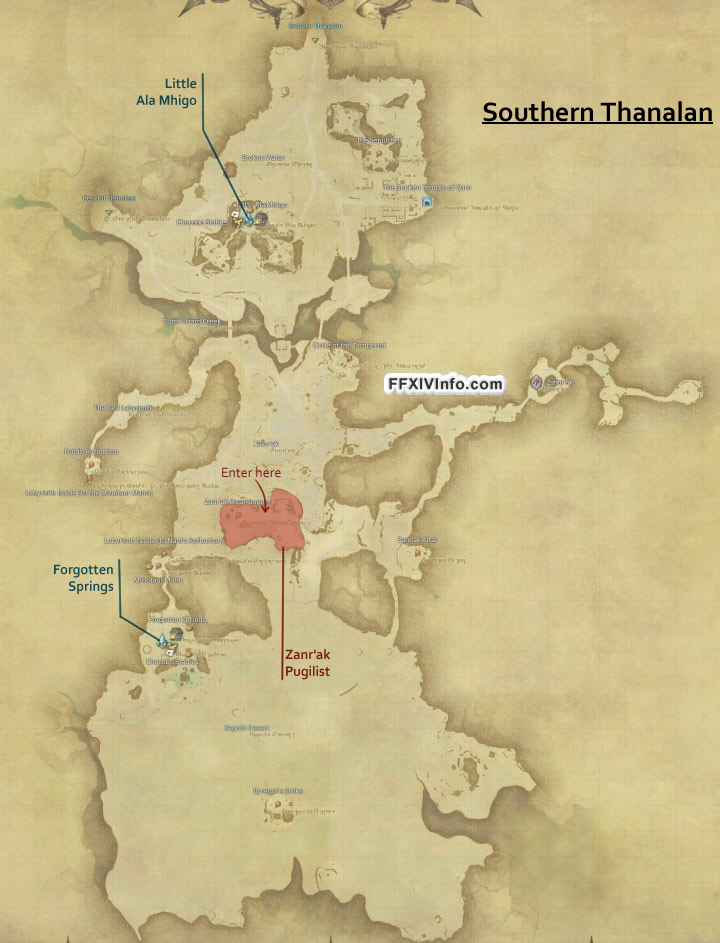
- Zanr'ak Pugilist x3 - Southern Thanalan
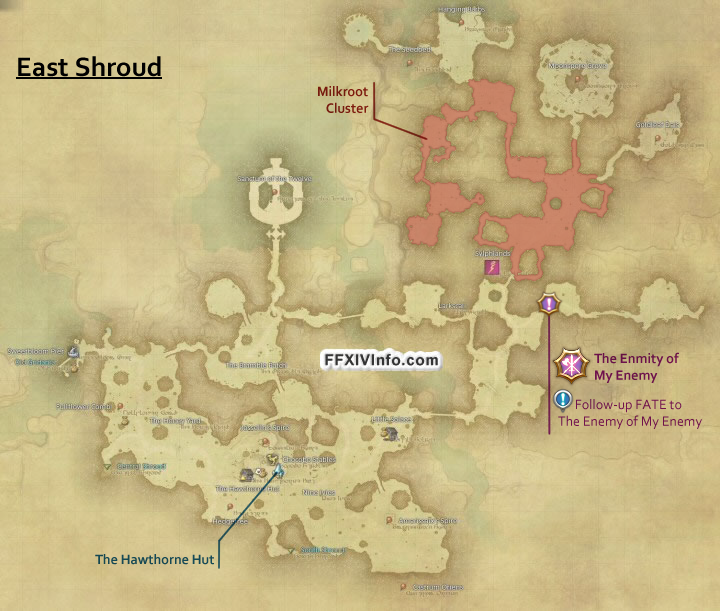
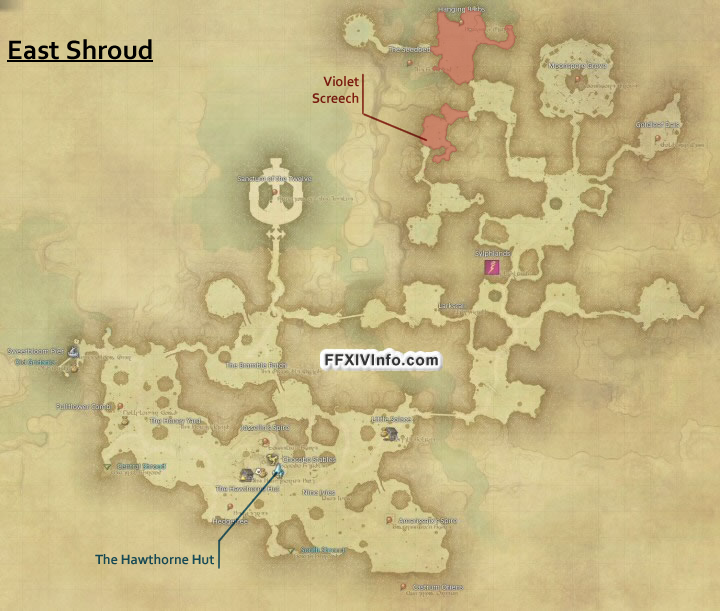
- Milkroot Cluster x3 - East Shroud
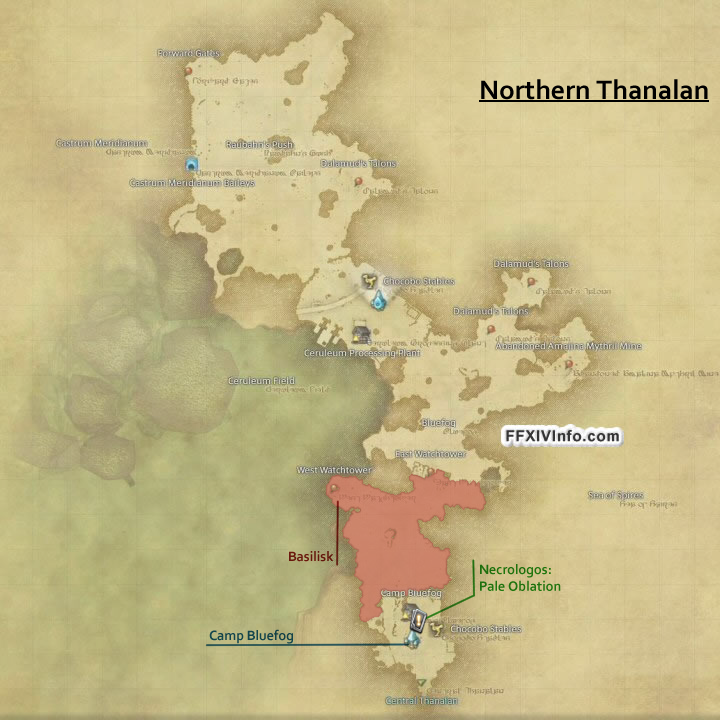
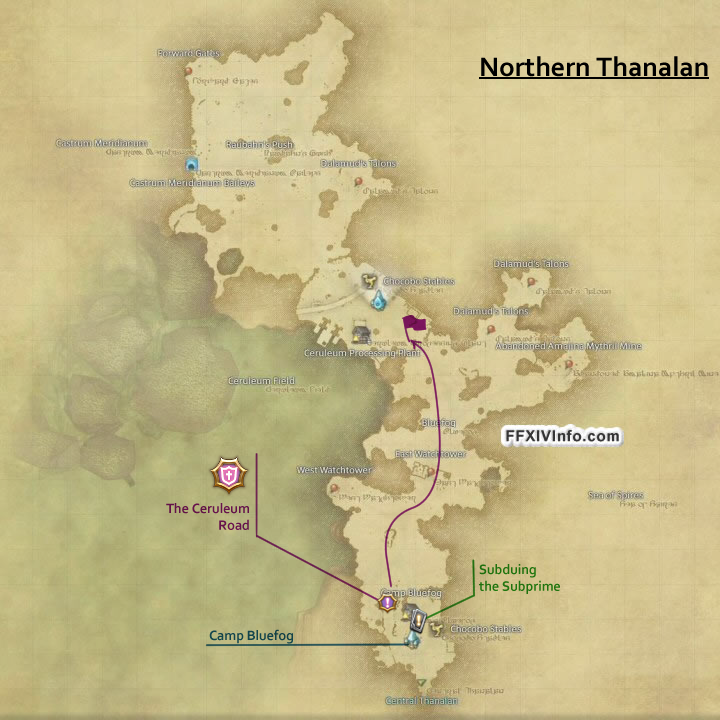
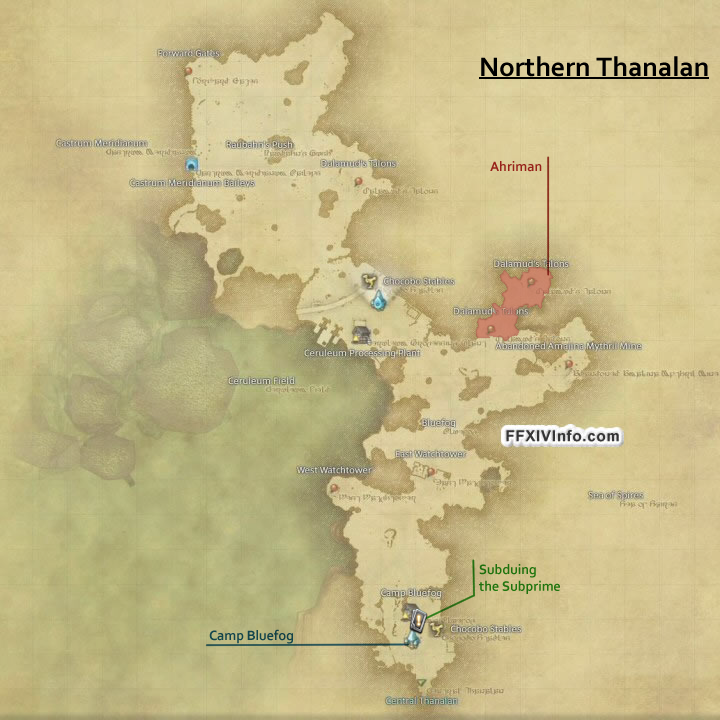
- Basilisk x3 - Northern Thanalan
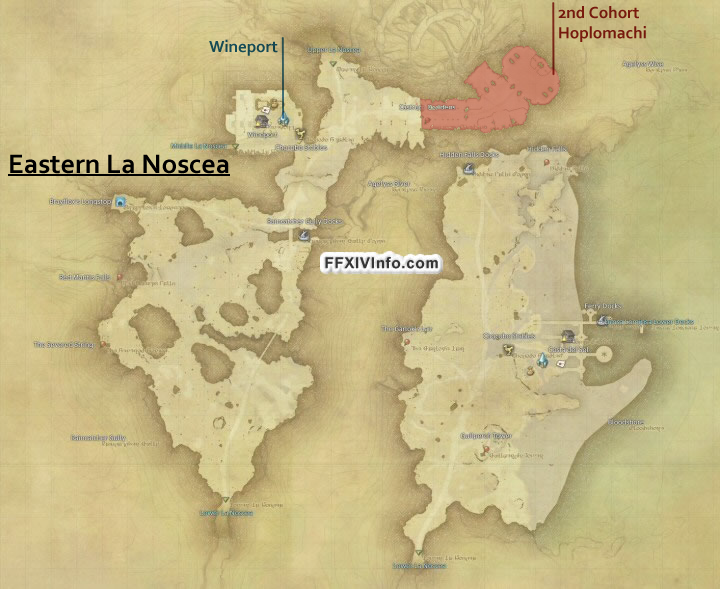
- 2nd Cohort Hoplomachus x3 - Eastern La Noscea
Duties
Maps

Book of Skyfire II
Enemies- Raging Harrier x3 - Mor Dhona
- Biast x3 - Coerthas Centra lHighlands
- Natalan Boldwing x3 - Coerthas Central Highlands
- Shoaltooth Sahagin x3 - Western La Noscea
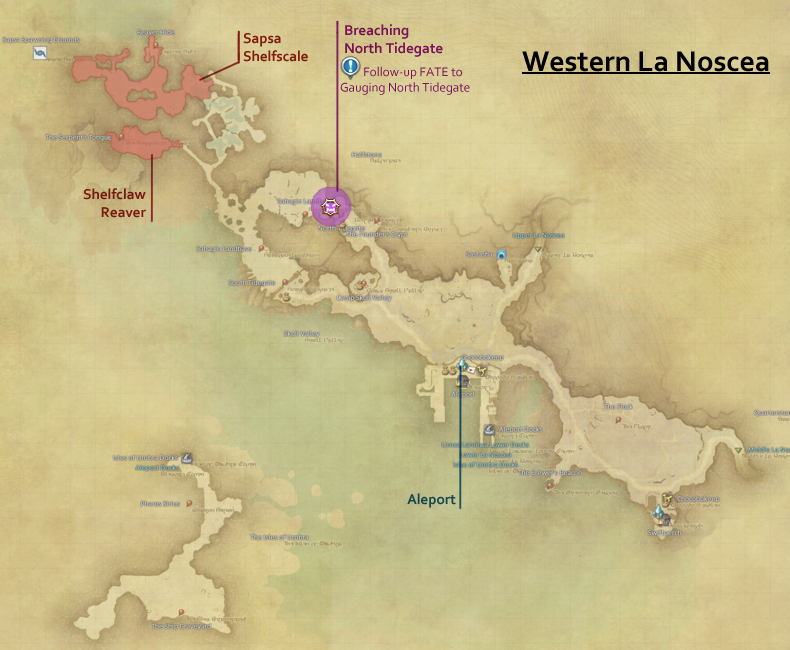
- Shelfscale Reaver x3 - Western La Noscea
- U'Ghamaro Golem x3 - Outer La Noscea
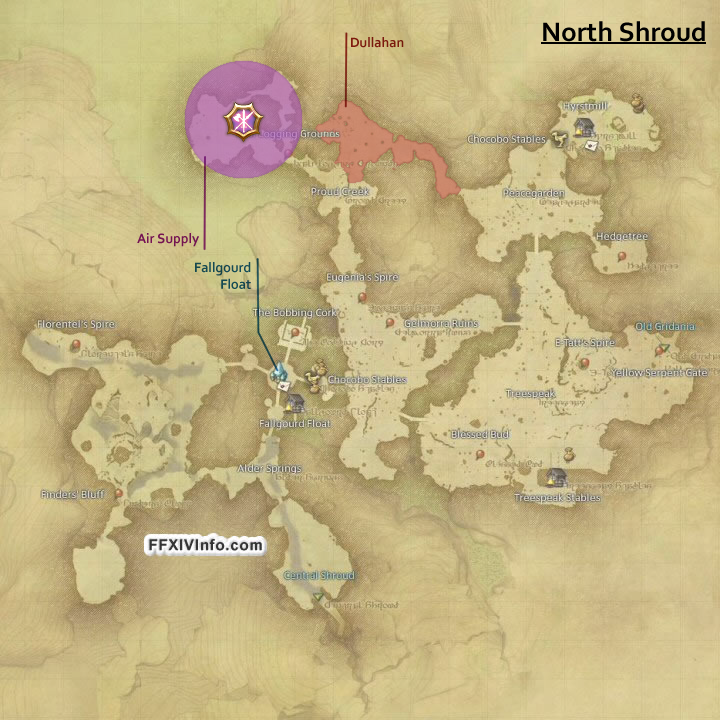
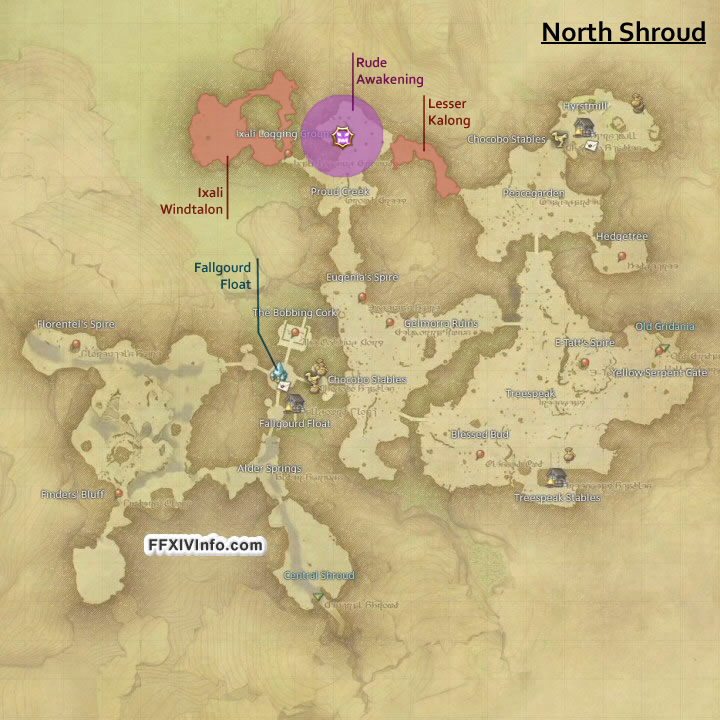
- Dullahan x3 - NorthShroud
- Sylpheed Sigh x3 - East Shroud
- Zahar'ak Archer x3 - Southern Thanalan
- Tempered Gladiator x3 - Southern Thanalan
Duties
-
 Brayflox's Longstop
 - The Wanderer's Palace
- Copperbell Mines (Hard)
 Heroes of the 2nd - Southern Thanalan
- Breaching South Tidegate - Western La Noscea
- Air Supply - North Shroud
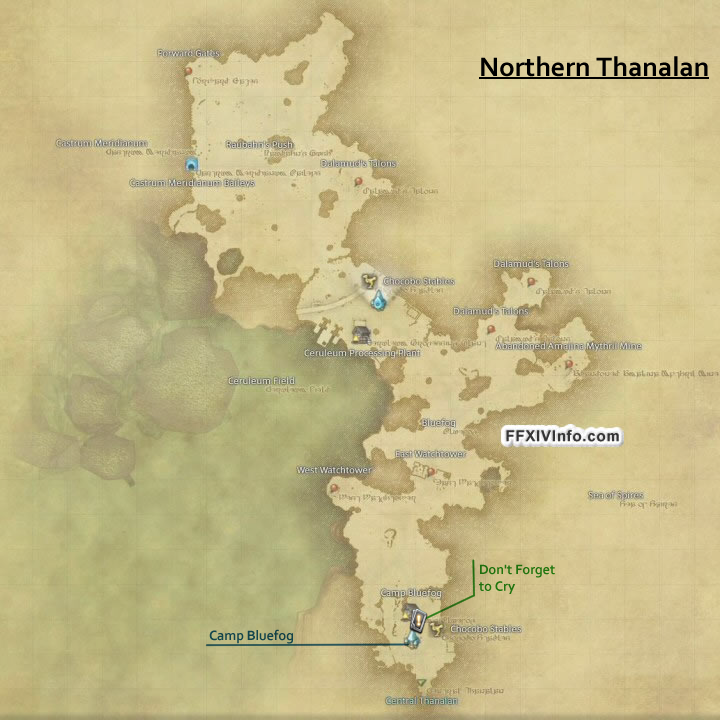
 Don't Forget to Cry - Northern Thanalan
- Yellow Is the New Black - Coerthas Central Highlands
- The Museum Is Closed - Mor Dhona
Maps

Book of Netherfire I
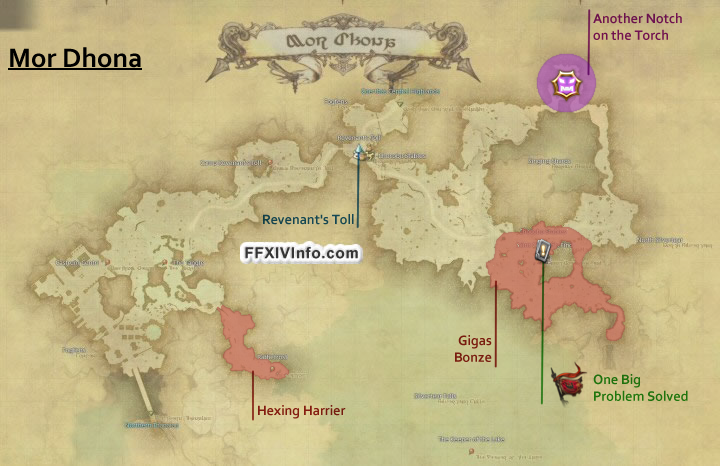
Enemies- Hexing Harrier x3- Mor Dhona
- Gigas Bonze x3- Mor Dhona
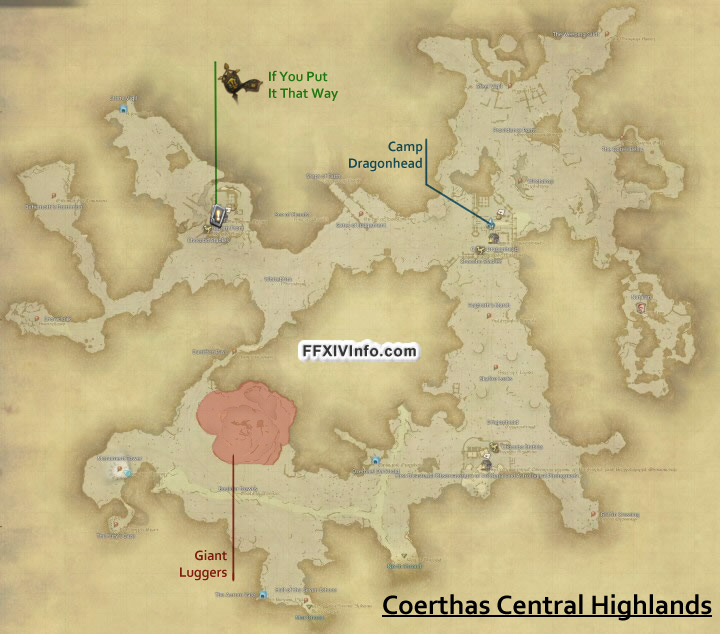
- Giant Lugger x3- Coerthas Central Highlands
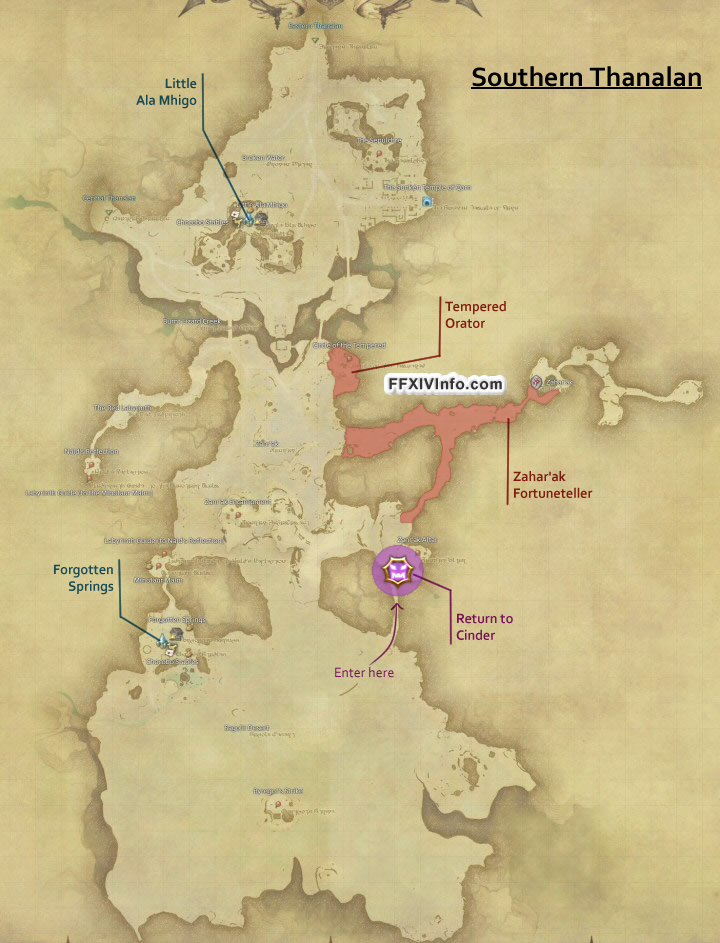
- Zahar'ak Fortune-teller x3- Southern Thanalan
- Tempered Orator x3- Southern Thanalan
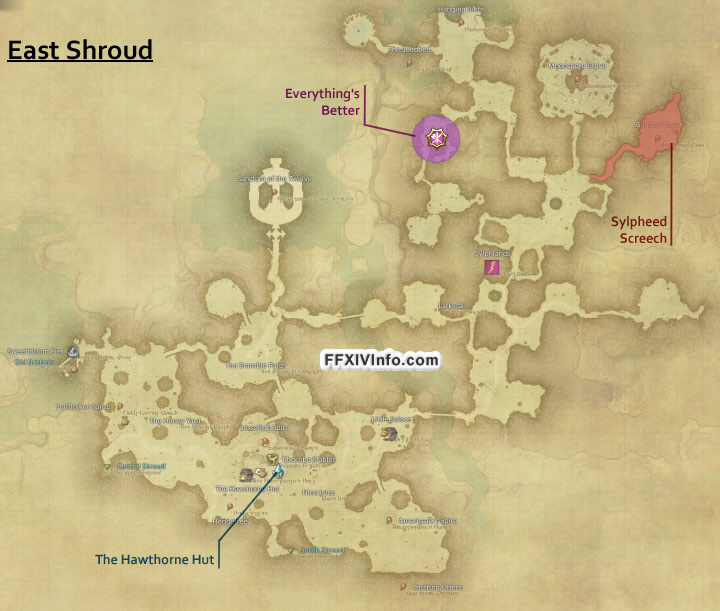
- Sylpheed Screech x3- East Shroud
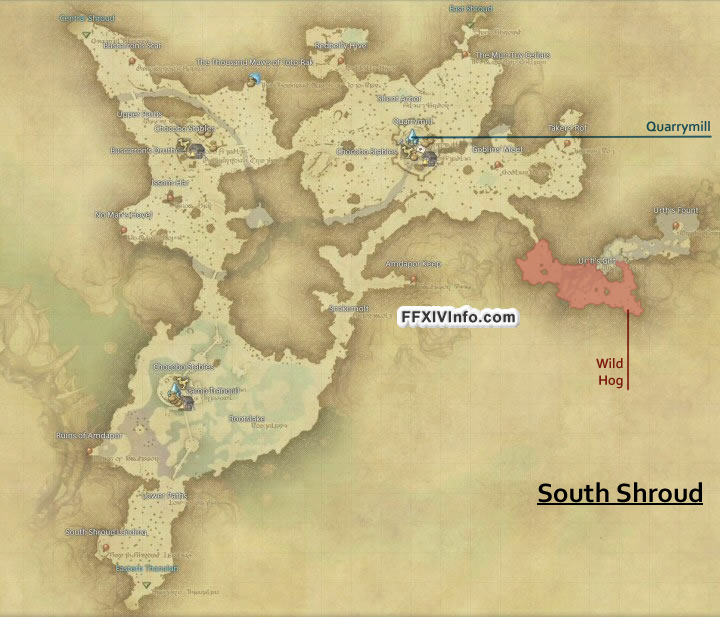
- Wild Hog x3- South Shroud
- 2nd Cohort Laquearius x3- Eastern La Noscea
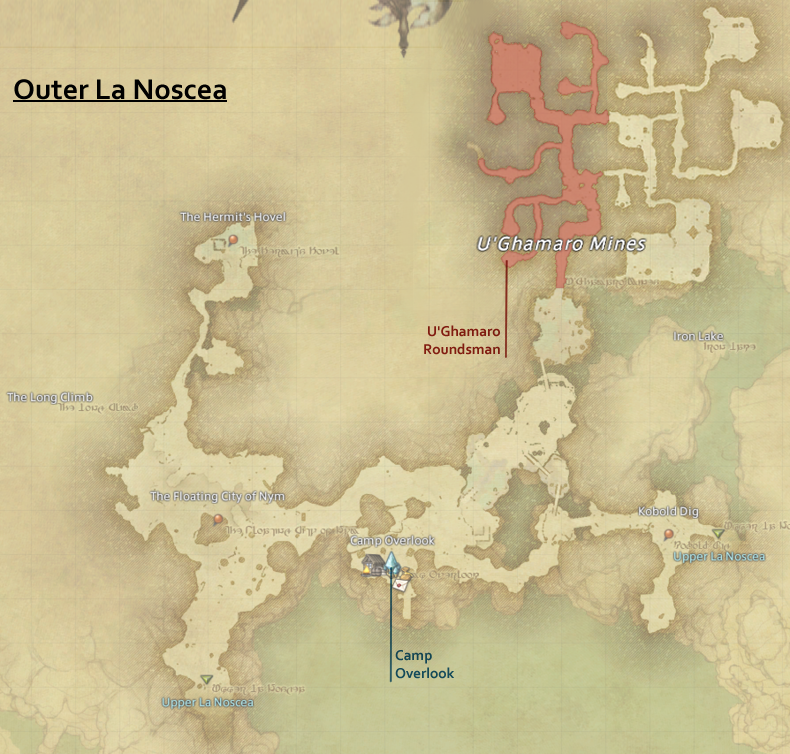
- U'Ghamaro Roundsman x3- Outer La Noscea
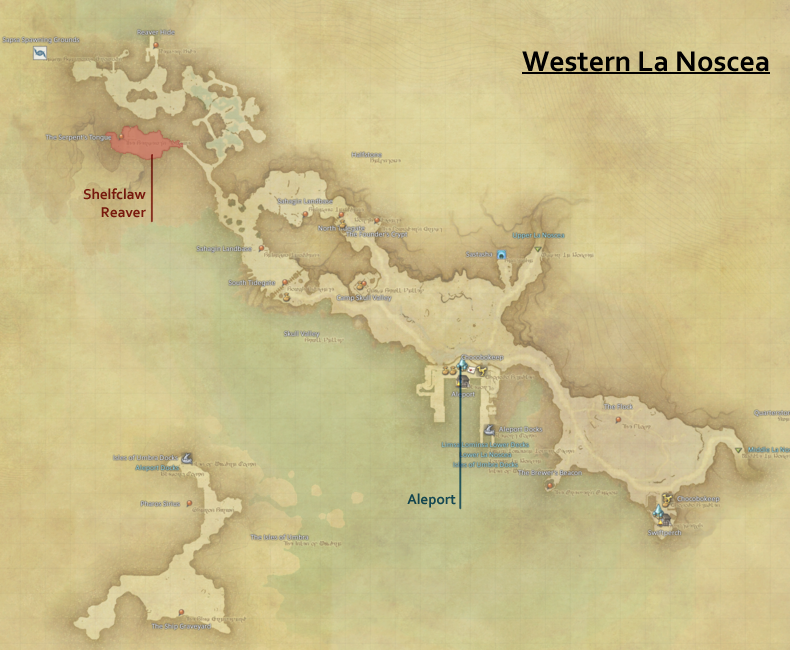
- Shelfclaw Reaver x3- Western La Noscea
Duties
- The Sunken Temple of Qarn
- Haukke Manor (Hard)
- Halatali (Hard)
- Another Notch on the Torch - Mor Dhona
- Everything's Better - East Shroud
- Return to Cinder - Southern Thanalan
- One Big Problem Solved - Mor Dhona
- If You Put It That Way - Coerthas Central Highlands
- Circling the Ceruleum - Northern Thanalan
Maps


The Books of Fall
Book of Skyfall I
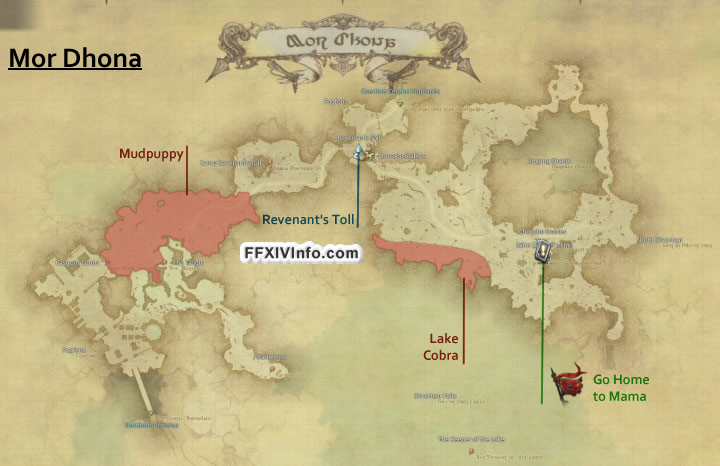
Enemies- Lake Cobra x3- Mor Dhona
- Mudpuppy x3- Mor Dhona
- Giant Reader x3- Coerthas Central Highlands
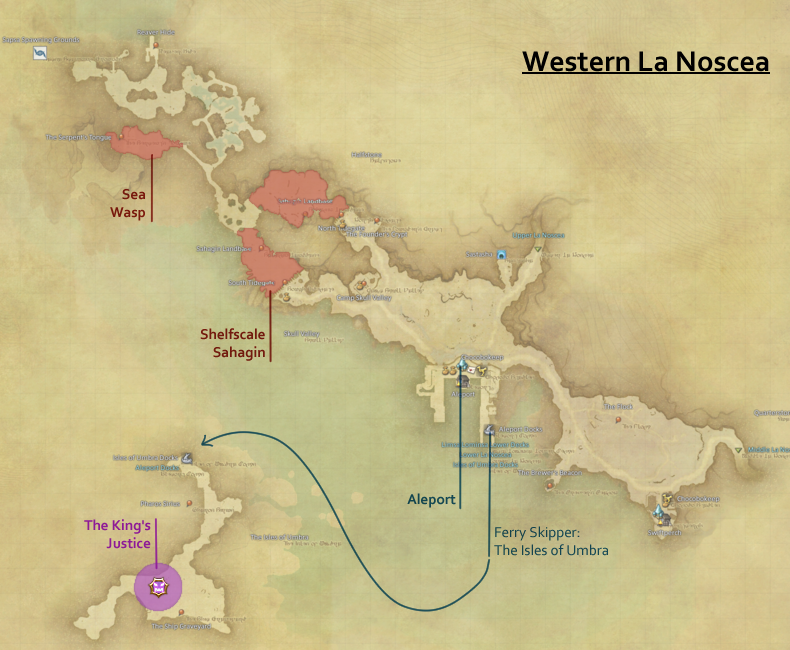
- Shelfscale Sahagin x3- Western La Noscea
- Sea Wasp x3- Western La Noscea
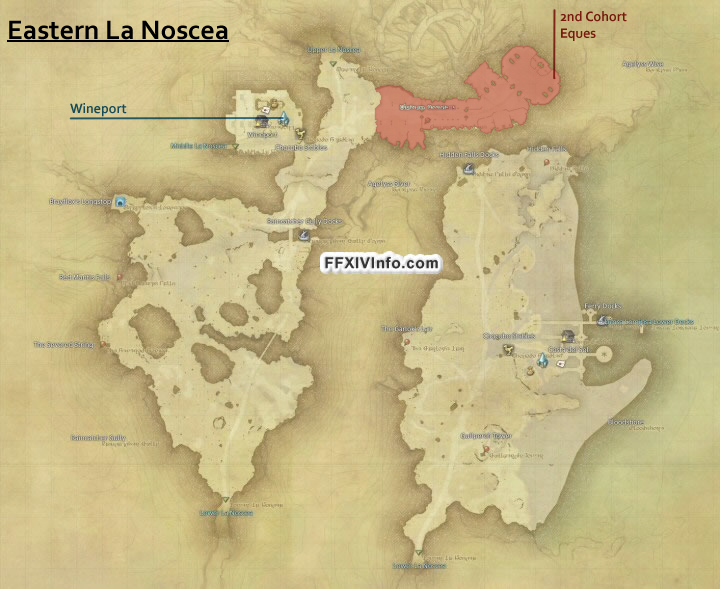
- 2nd Cohort Eques x3- Eastern La Noscea
- U'Ghamaro Quarryman x3- Outer La Noscea
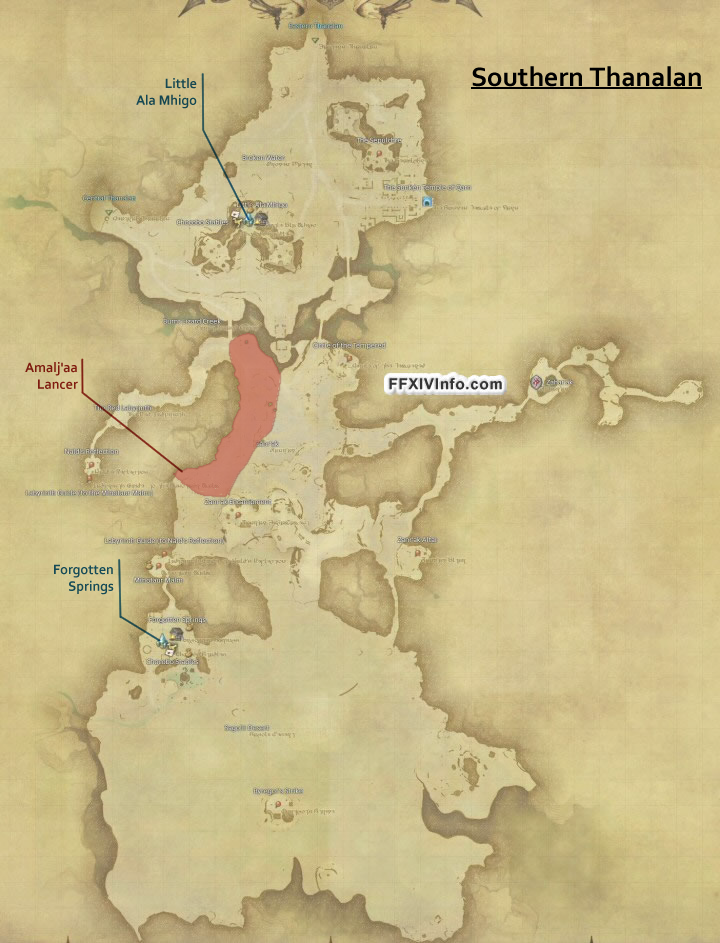
- Amalj'aa Lancer x3- Southern Thanalan
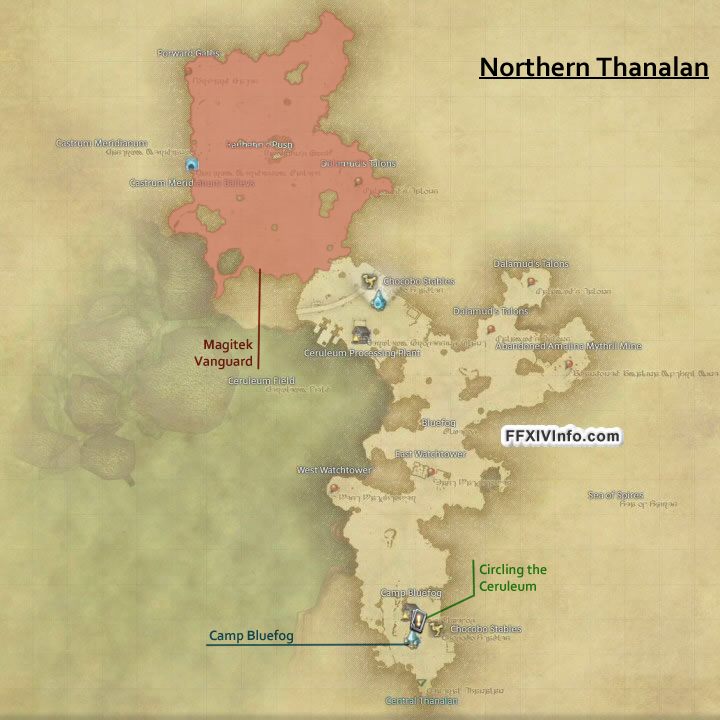
- Magitek Vanguard x3- Northern Thanalan
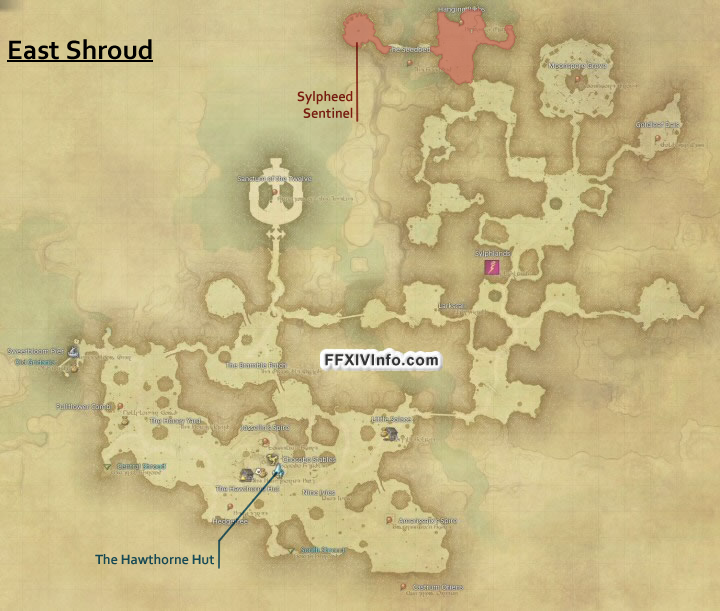
- Sylphlands Sentinel x3- East Shroud
Duties
- Copperbell Mines
- Dzemael Darkhold
- Brayflox's Longstop (Hard)
- Bellyful - Coerthas Central Highlands
- The King's Justice - Western La Noscea
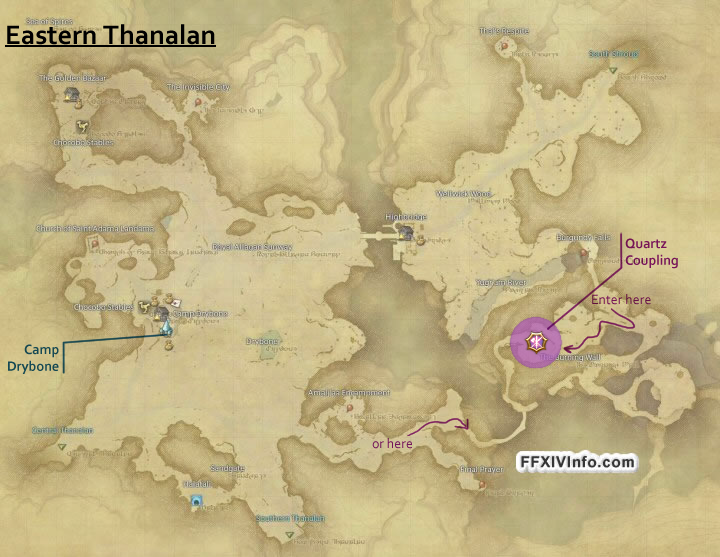
- Quartz Coupling - Eastern Thanalan
- Circling the Ceruleum - Northern Thanalan
- Necrologos: Whispers of the Gem - Coerthas Central Highlands
- Go Home to Mama - Mor Dhona
Maps


Book of Skyfall II
Enemies- Gigas Bhikkhu x3 - Mor Dhona
- 5th Cohort Hoplomachus x3 - Mor Dhona
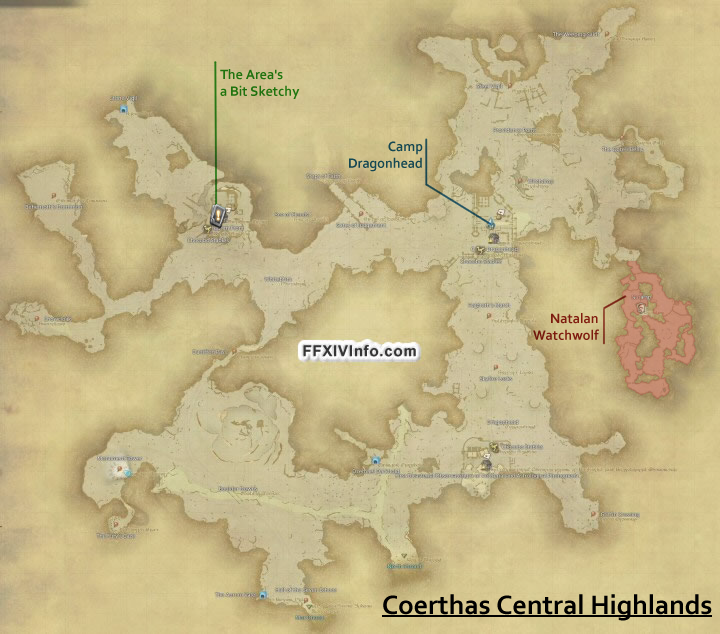
- Natalan Watchwolf x3 - Coerthas Central Highlands
- Sapsa Shelfscale x3 - Western La Noscea
- Shelfeye Reaver x3 - Western La Noscea
- U'Ghamaro Bedesman x3 - Outer La Noscea
- 4th Cohort Laquearius x3 - Western Thanalan
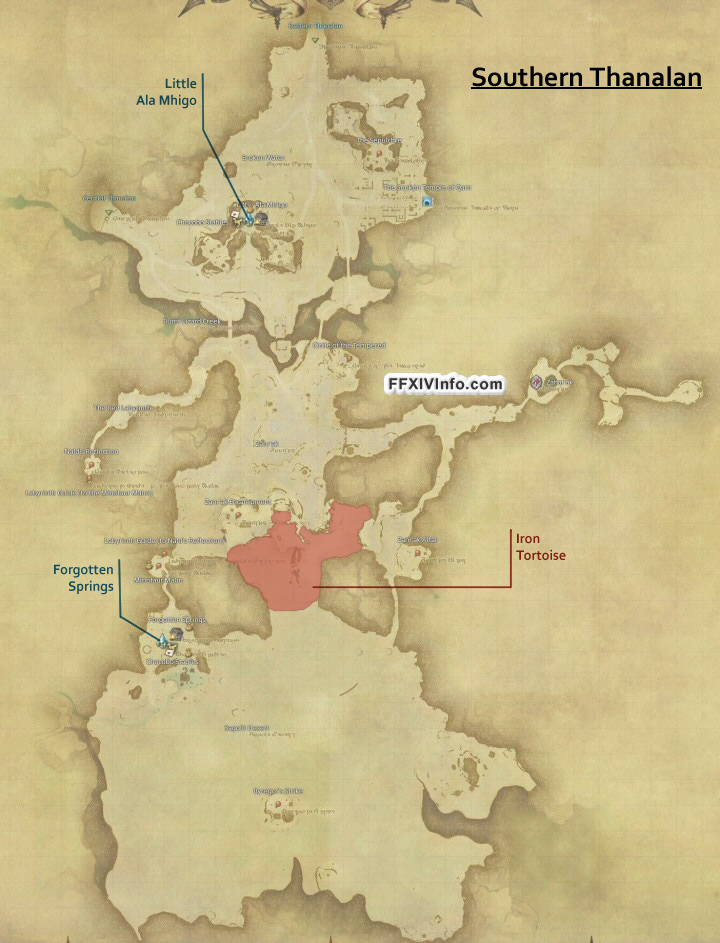
- Iron Tortoise x3 - Southern Thanalan
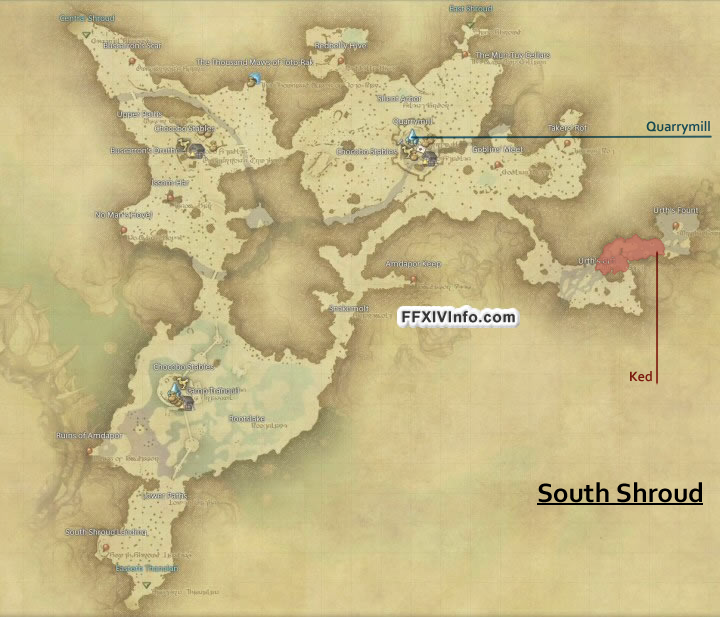
- Ked x3 - South Shroud
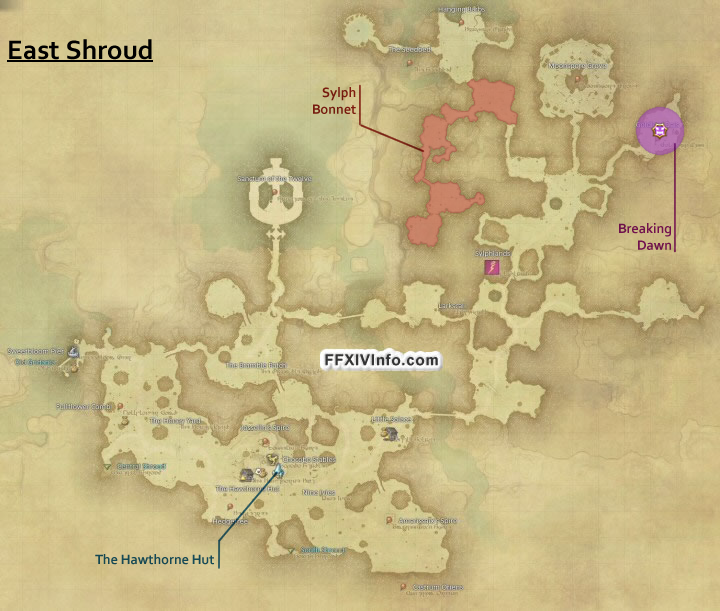
- Sylph Bonnet x3 - East Shroud
Duties
Maps


Book of Netherfall I
Enemies- 5th Cohort Laquearius x3 - Mor Dhona
- Gigas Sozu x3 - Mor Dhona
- Snow Wolf x3 - Coerthas Central Highlands
- Sapsa Shelfclaw x3 - Western La Noscea
- U'Ghamaro Priest x3 - Outer La Noscea
- 4th Cohort Secutor x3 - Western Thanalan
- Amalj'aa Brigand x3 - Southern Thanalan
- Ixali Windtalon x3 - North Shroud
- Violet Screech x3 - East Shroud
- Lesser Kalong x3 - South Shroud
Duties
Maps

The books of Wind
Book of Skywind I
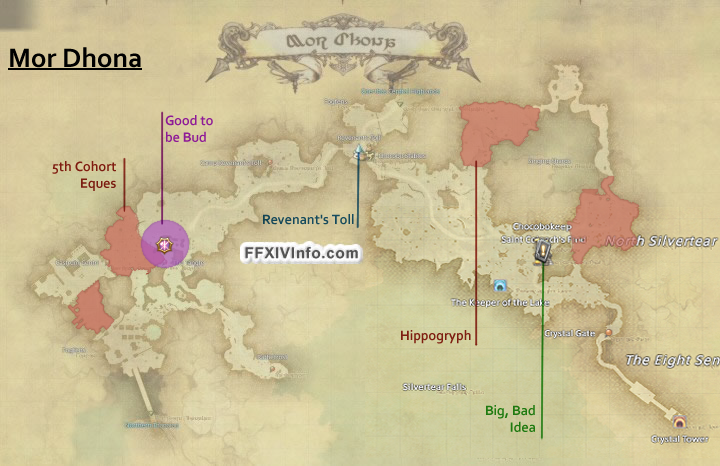
Enemies- 5th Cohort Eques x3 - Mor Dhona
- Hippogryph x3 - Mor Dhona
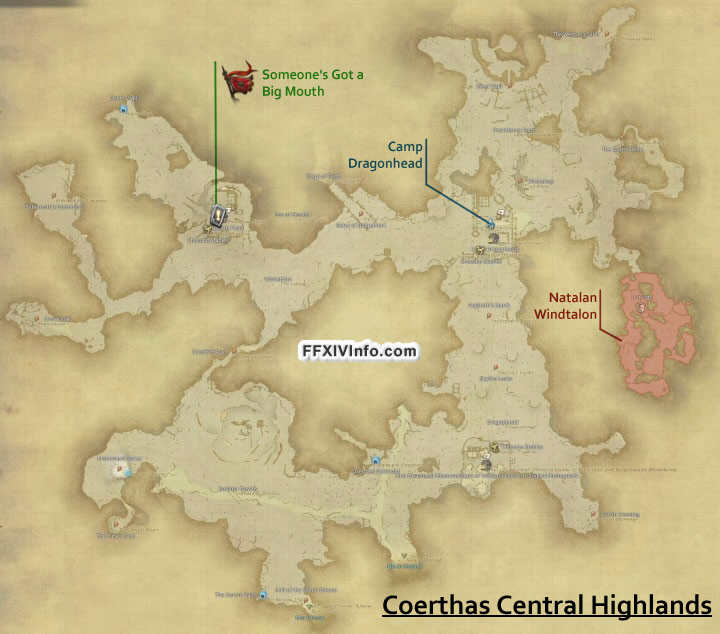
- Natalan Windtalon x3 - Coerthas Central Highlands
- Sylpheed Snarl
 x3 - East Shroud
 - Amalj'aa Thaumaturge x3 - Southern Thanalan
- Ahriman x3 - Northern Thanalan
- 2nd Cohort Secutor x3 - Eastern La Noscea
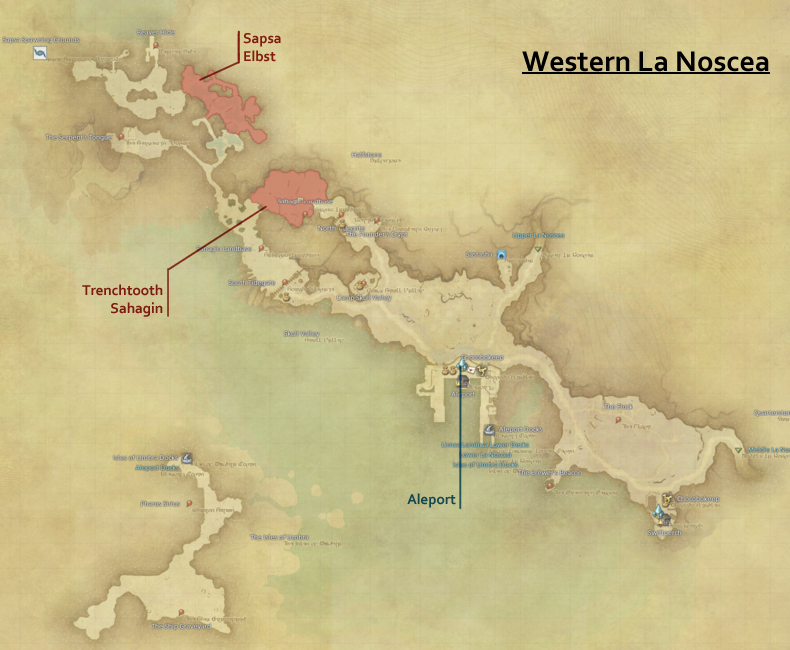
- Trenchtooth Sahagin x3 - Western La Noscea
- Sapsa Elbst x3 - Western La Noscea
- Elite Roundsman x3 - Outer La Noscea
Duties
- Sastasha
- The Aurum Vale
- Halatali (Hard)
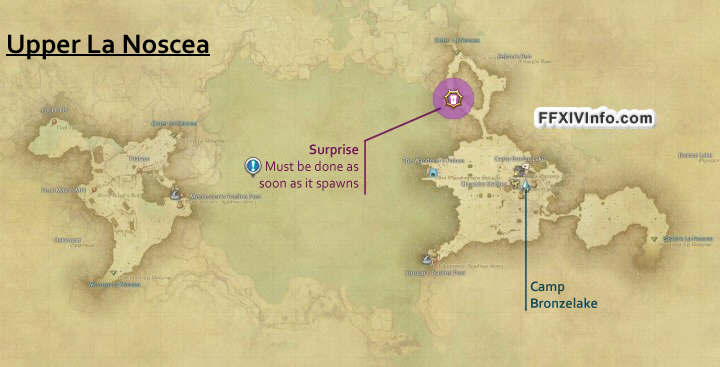
- Surprise - Upper La Noscea
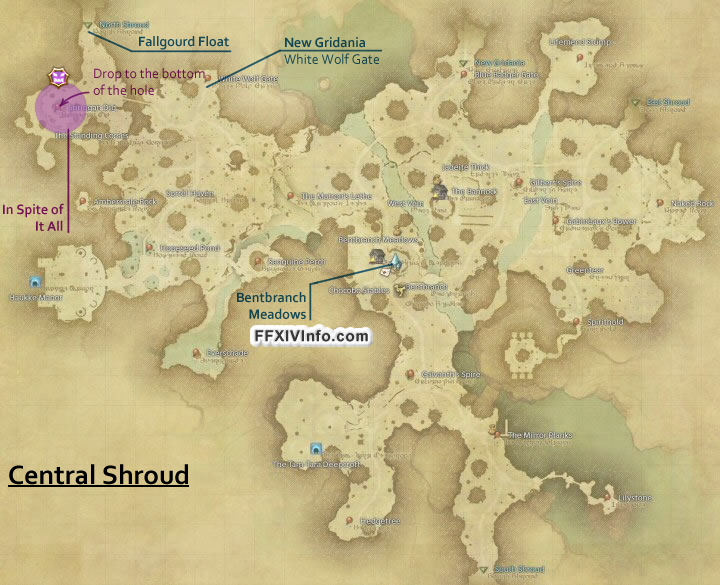
- In Spite of It All - Central Shroud
- Good to Be Bud - Mor Dhona
- Subduing the Subprime - Northern Thanalan
- Big, Bad Idea - Mor Dhona
- Someone's Got a Big Mouth - Coerthas Central Highlands
Maps

Book of Skywind II
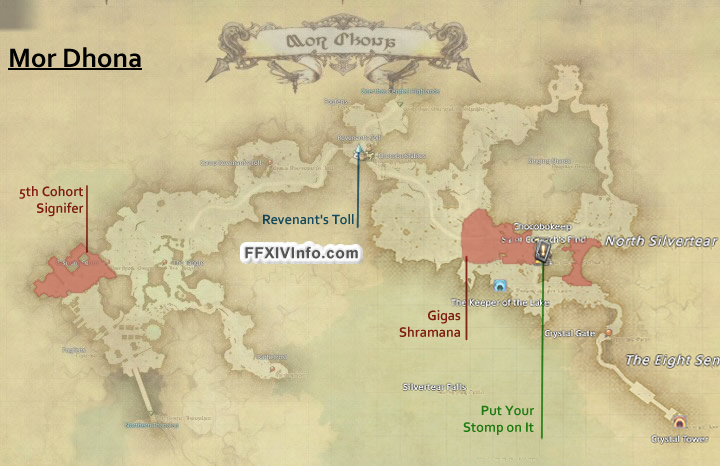
Enemies- Gigas Shramana x3 - Mor Dhona
- 5th Cohort Signifer x3 - Mor Dhona
- Elite Priest x3 - Outer La Noscea
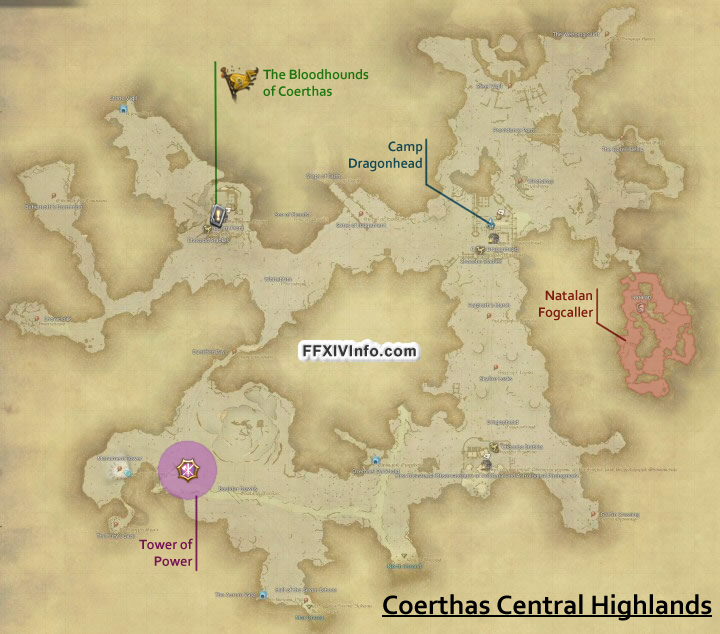
- Natalan Fogcaller x3 - Coerthas Central Highlands
- Dreamtoad x3 - East Shroud
- 4th Cohort Signifer x3 - Western Thanalan
- Watchwolf x3 - North Shroud
- Zahar'ak Battle Drake x3 - Southern Thanalan
- Amalj'aa Archer x3 - Southern Thanalan
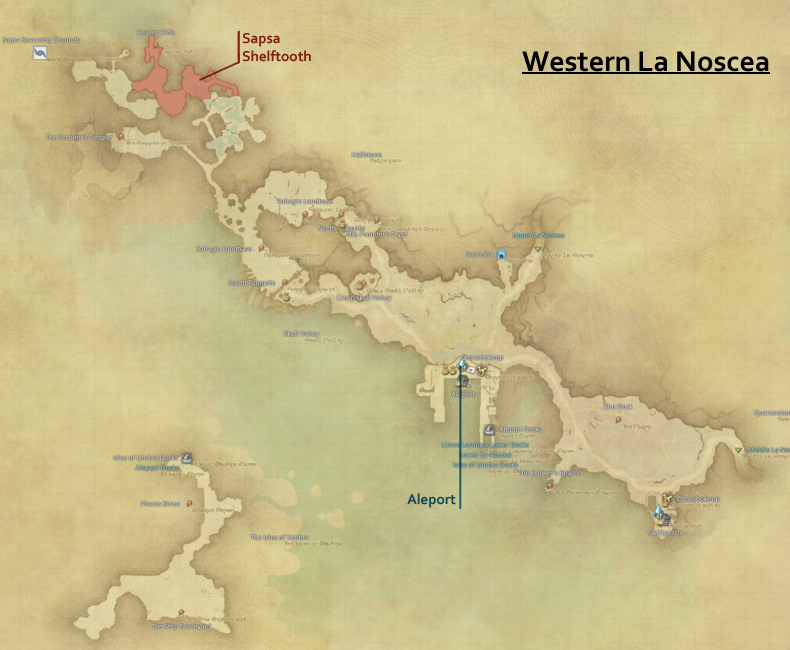
- Sapsa Shelftooth x3 - Western La Noscea
Duties
- Haukke Manor
- Copperbell Mines (Hard)
- Brayflox's Longstop (Hard)
- Taken - Southern Thanalan
- Tower of Power - Coerthas Central Highlands
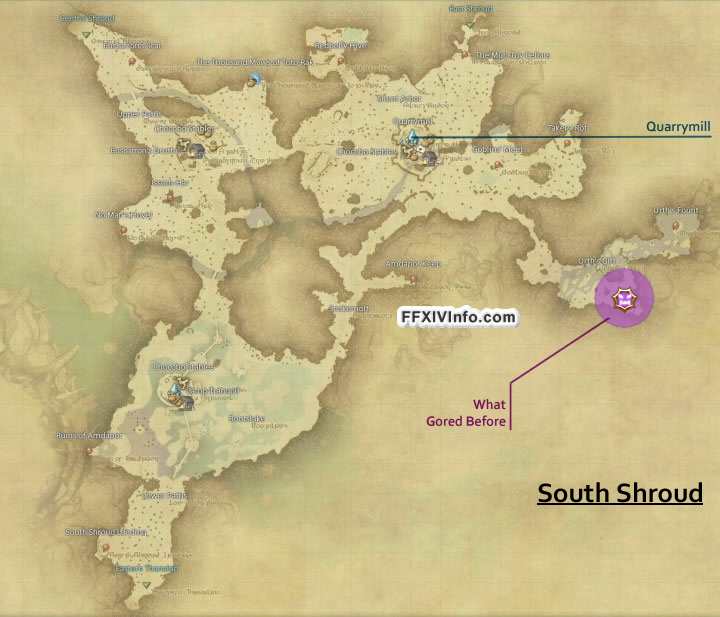
- What Gored Before - South Shroud
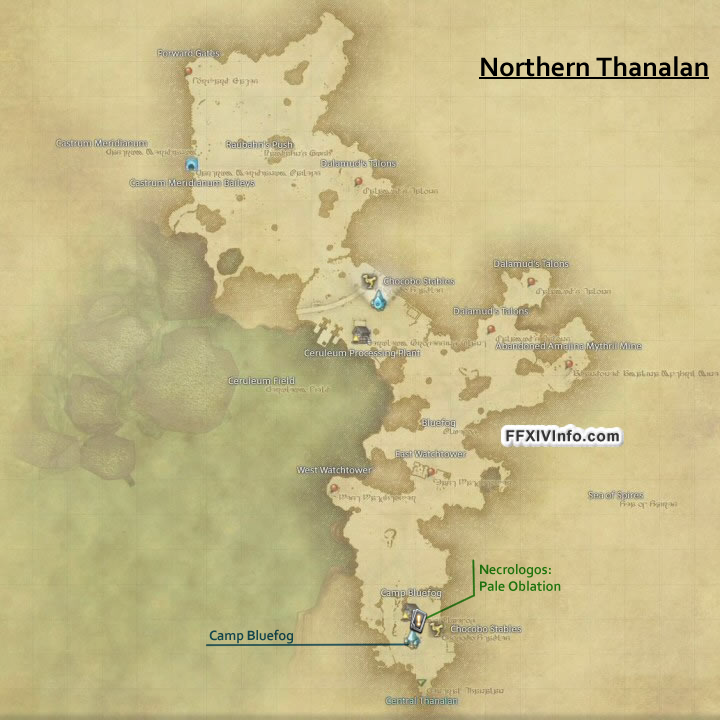
- Necrologos: Pale Oblation - Northern Thanalan
- Put Your Stomp on It - Mor Dhona
- The Bloodhounds of Coerthas - Coerthas Central Highlands
Maps


The books of Earth
Book of Skyearth I
Enemies- Amalj'aa Scavenger x3 - Southern Thanalan
- Zahar'ak Pugilist x3 - Southern Thanalan
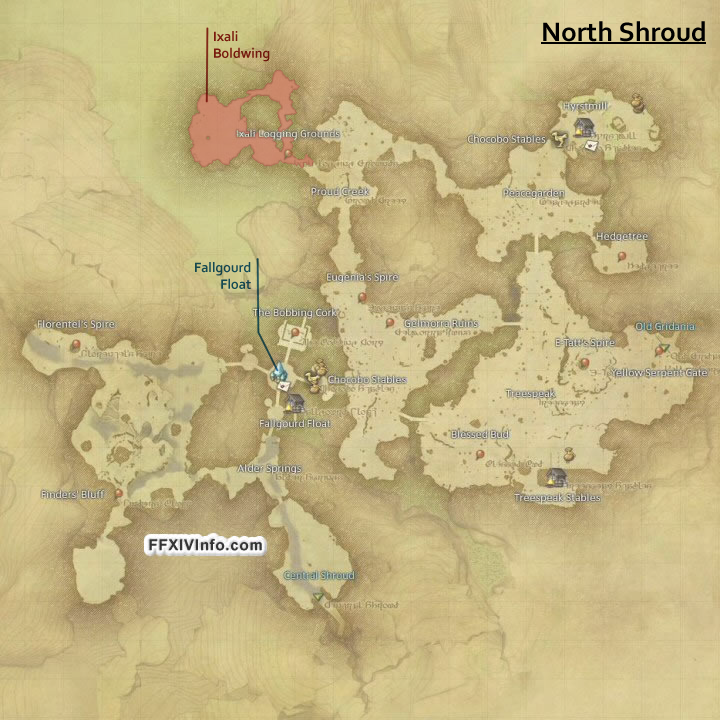
- Ixali Boldwing x3 - North Shroud
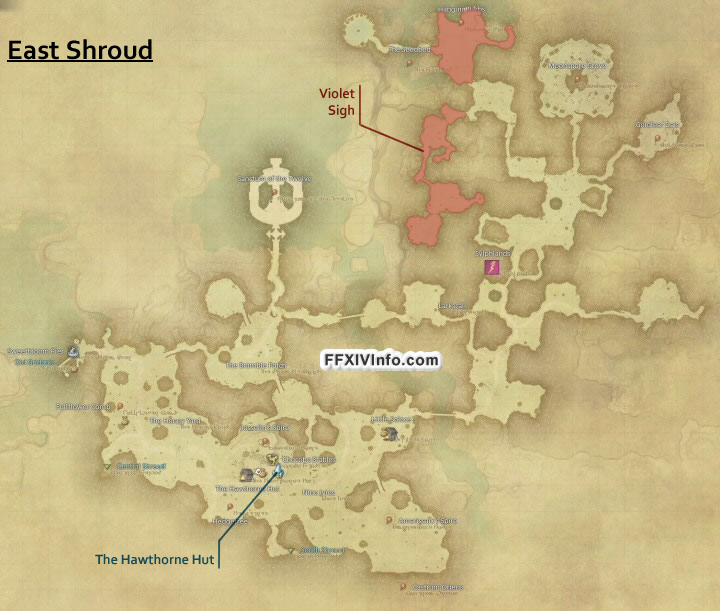
- Violet Sigh x3 - East Shroud
- Axolotl x3 - Western La Noscea
- 5th Cohort Secutor x3 - Mor Dhona
- Hapalit x3 - Mor Dhona
- Elite Quarryman x3 - Outer La Noscea
- Natalan Swiftbeak x3 - Coerthas Central Highlands
- 2nd Cohort Signifer x3 - Eastern La Noscea
Duties
Maps

5 - Novus
While it makes no major difference. if you already bought some of the mats previously this step will be that much easier.
- Talk with Jalzahn Daemir while having your Animus weapon equipped and accept the quest Celestial Radiance.
- If you haven't done so before, purchase 3 Superior Enchanted Ink from a Rowena's Representative (such as Auriana) and deliver then to Hubairtin to receive a Sphere Scroll for your weapon.
- Infuse 75 Materia to your Sphere Scroll. This will also require 75 Alexandrite (see Initial Preparations).
ℹ️ Important
You won't be able to add 75 materia from one single type as there is a minimum of 2 stats required.
Each stat also maxes out at 44.
The scroll has a mechanic in which the materia ranks will unlock every 11 infuses, keep this in mind when buying the materia you need (e.g. You have to infuse 11 Rank I Materia to unlock Rank II infuses of that same materia).
As this is not a current weapon anymore, pick the cheapest materia available to complete this as the stat line-up won't matter. - With the 75 Materia added to your Sphere Scroll, talk to Jalzahn Daemir to accept the quest Star Light, Star Bright.
- Speak to him again and select Relic Weapon Animum Enhancement while holding the weapon in your inventory.
6 - Nexus
On this step you will have to infuse your newly acquired weapon with light.
In summary:
- Equip your Novus Weapon and talk to Jalzahn Daemir to start the quest Mmmmmm, Soulglazed Relics.
- Talk to him again and select Zodiac Relic Weapon Novus Soulglazing and select your weapon to add the Soulgazing effect and prepare it to receive light.
- Perform various activities with your weapon equipped until you've added 2000 light to it (your Zodiac Glass will tell you that the weapon has "Bursting Activity" once it's complete).
- After you've added all the 2000 light to your weapon, return to Jalzahn Daemir and select Relic Weapon Novus Enhancement with the weapon in your inventory.
ℹ️ Activities
The activities that reward light include: ARR Raids, ARR Trials, ARR Dungeons, PVP, Treasure/Alexandrite maps, FATEs and Levequests
There is a bonus light mechanic that alters the amount given by each activity, this window rotates every two hours.
🔥 Tip
You may do the ARR dungeons, trials or raids unsync and using your max level weapon, as long as you equip the Novus Relic before the final boss. Only the final boss kill will count for this!
As some dungeons were streamlined on patch 6.1 these will be faster to do unsync, one good example is The Thousand Maws of Toto-Rak
Light Values
| Light given | With bonus | Duties |
|---|---|---|
| Feeble (8) | Gentle (16) | The Bowl of Embers FATEs Treasure maps |
| Gentle (16) | Bright (32) | Alexandrite maps Hard Trials Urth’s Fount The Porta Decumana The Howling Eye (Extreme) The Minstrel’s Ballad: Ultima’s Bane Binding Coil of Bahamut Turn4 |
| Bright (32) | Brilliant (48) | All Extreme trials except: The Howling Eye, Binding Coil of Bahamut Turns 1, 2 and 5 All Second Coils of Bahamut (including savage) All Final Coils of Bahamut The Wanderer’s Palace Amdapor Keep Pharos Sirius Copperbell Mines (Hard) The Lost City of Amdapor Halatali (Hard) Brayflox’s Longstop (Hard) |
| Brilliant (48) | Blinding (96) | Sastasha The Tam-Tara Deepcroft Copperbell Mines Halatali The THousand Maws of Toto-Rak Haukke Manor Brayflox’s Longstop The Sunken Temple of Qarn Cutter’s Cry The Stone Vigil, Dzemael Darkhold The Aurum Vale Castrum Meridianum The Praetorium Hullbreaker Isle The Tam-Tara Deepcroft (Hard) The Stone Vigil (Hard) Snowcloak Sastasha (Hard) The Keeper of the Lake The Borderland Ruins (secure) The Labyrinth of the Ancients |
| Blinding (96) | Newborn Star (128) | Syrcus Tower The World of Darkness |
7 - Zodiac Braves
This step starts by picking up the quest Wherefore Art Thou, Zodiac from Jalzahn.
After you complete it, you will need to pick up the 4 following quests:
- A Ponze of Flesh - Papana (Mor Dhona)
- Labor of Love - Guiding Star (Mor Dhona)
- Method in His Malice - Adkin (Central Thanalan)
- A Treasured Mother - Bragwine (Mor Dhona)
If you already bought some of the items at the start, it helps a lot completing this step as it requires quite a substantial amount of spending.
For reference, completing all four of these quests requires buying:
- 4 Bombard cores - 80.000 Grand Company Seals
- 4 Sacred Spring Water - 800 Poetics
- 4 Items bought with gil - 400.000 Gil
- Bronze Lake Crystal
- Allagan Resin
- Furite Sand
- Brass Kettle
The quests also need specifically crafted ![]() High Quality items.
High Quality items.
Crafting these will need the Master Recipes I book for each of the crafting jobs needed (more details below).
Alternatively, you can search and grab these from the marketboard. 😊
The Quests
A Ponze of Flesh
|
Starts at: Papana - Mor Dhona (x23, y7.4) Rewards: Book of Skylight |
|
Dungeons |
Shopping list |
| Dzemael Darkhold Brayflox's Longstop (Hard) Halatali (Hard) Snowcloak |
Bombard Core - 20.000 Grand Company Seals Sacred Spring Water - 200 Poetics Bronze Lake Crystal - 100.000 Gil |
Crafted items |
|
| Furnace Ring |
Perfect Firewood |
|
Craft it yourself!
To craft the Furnace Ring requires 1 Aged Eye of Fire that can only be obtained from Desynthesis. |
Craft it yourself!
To craft the Perfect Firewood requires 1 Aged Spear Shaft that can only be obtained from Desynthesis. |
Labor of Love
|
Starts at: Guiding Star - Mor Dhona (x22, y6.9) Rewards: Zodium |
|
Dungeons |
Shopping list |
| The Aurum Vale Haukke Manor (Hard) The Lost City of Amdapor Sastasha (Hard) |
Bombard Core - 20.000 Grand Company Seals Sacred Spring Water - 200 Poetics Allagan Resin - 100.000 Gil |
Crafted items |
|
| Perfect Mortar |
Perfect Pestle |
|
Craft it yourself!
To craft the Perfect Mortar requires 1 Aged Mortar Pieces that can only be obtained from Desynthesis. |
Craft it yourself!
To craft the Perfect Pestle requires 1 Aged Pestle Pieces that can only be obtained from Desynthesis. |
Method in His Malice
|
Starts at: Adkin - Central Thanalan (x23.7, y13.7) Rewards: Zodiac Scroll |
|
Dungeons |
Shopping list |
| The Wanderer's Palace Copperbell Mines (Hard) Hullbreaker Isle The Sunken Temple of Qarn (Hard) |
Bombard Core - 20.000 Grand Company Seals Sacred Spring Water - 200 Poetics Furite Sand - 100.000 Gil |
Crafted items |
|
| Perfect Vellum |
Perfect Pounce |
|
Craft it yourself!
To craft the Perfect Vellum requires 1 Aged Vellum that can only be obtained from Desynthesis. |
Craft it yourself!
To craft the Perfect Pounce requires 1 Dried Ether that can only be obtained from Desynthesis. |
A Treasured Mother
|
Starts at: Brangwine - Mor Dhona (x22, y6.7) Rewards: Flawless Alexandrite |
|
Dungeons |
Shopping list |
| Amdapor Keep Pharos Sirius The Tam-Tara Deepcroft (Hard) The Stone Vigil (Hard) |
Bombard Core - 20.000 Grand Company Seals Sacred Spring Water - 200 Poetics Brass Kettle - 100.000 Gil |
Crafted items |
|
| Tailor-made Eel Pie |
Perfect Cloth |
|
Craft it yourself!
To craft the Tailor-made Eel Pie requires 1 Vintage Cooking Sherry that can only be obtained from Desynthesis. |
Craft it yourself!
To craft the Perfect Cloth requires 1 Stained Cloth that can only be obtained from Desynthesis. |
Unlocking Zodiac Weapon Recreation
Once all quests are complete, if this is your first time you will have one additional quest to complete.
✅ One time quest!
Talk to Gerolt to accept His Dark Materia
Go to Mutamix Bubblypots and return to Gerolt to complete it.
For consecutive relics, you just need to speak to Jalzahn and select Zodiac Weapon Recreation.
8 - Zodiac Zeta
The last steps!
This will also require some Poetics spending as it will require you to buy Mahatma for 50 Poetics each, totalling 600 Poetics for all 12 Mahatma required.
This mechanic works a lot like the 6 - Nexus step.
- Equip your Zodiac weapon and pick up the quest Rise and Shine from Jalzahn.
- Talk to Remon to infuse a Mahatma to your weapon for 50 Poetics.
- Perform activities to add 2000 soul resonance to it, once it's full, return to Remon for another one, totalling 12 Mahatma.
- Once all 12 Mahatma are done, go back to Jalzahn and select Zodiac Weapon Awakening with the weapon in your inventory.
Soul Resonance values
| Normal | With Bonus | Duty |
|---|---|---|
| Feeble (4) | Faint (8) | FATEs The Bowl of Embers The Navel The Howling Eye A Relic Reborn: The Chimera A Relic Reborn: The Hydra The Dragon’s Neck |
| Faint (8) | Gentle (16) | The Porta Decumana The Chrysalis Battle on the Big Bridge Battle in the Big Keep All Hard Trials Urth’s Fount The Minstrel's Ballad: Ultima’s Bane The Howling Eye (Extreme) Alexandrite maps |
| Gentle (16) | Steady (24) | All ARR Extreme trials (except The Howling Eye and Ultima’s Bane) All Bahamut raids Pharos Sirius Copperbell Mines (Hard) Brayflox’s Longstop (Hard) |
| Steady (24) | Forceful (48) | Sastasha The Tam-Tara Deepcroft Copperbell Mines The Thousand Maws of Toto-Rak Haukke Manor The Sunken Temple of Qarn Cutter’s Cry The Stone Vigil Dzemael Darkhold The Aurum Vale Snowcloak Castrum Meridianum The Praetorium The Keeper of the Lake Sastasha (Hard) The Wanderer’s Palace (Hard) Amdapor Keep (Hard) The Borderland Ruins (Secure) The Labyrinth of the Ancients |
| Forceful (48) | Nigh Sings (64) | Syrcus Tower The World of Darkness |
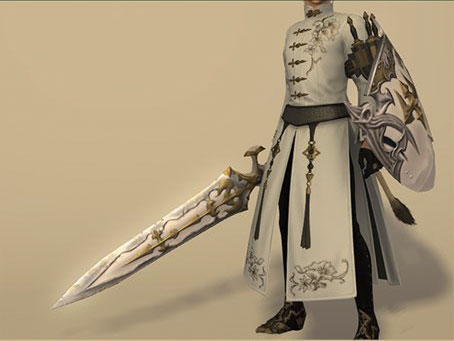
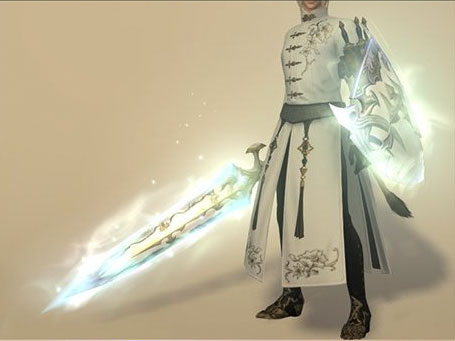
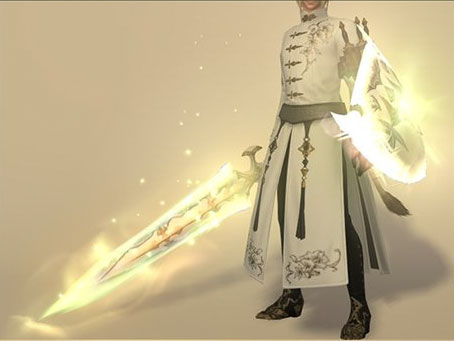
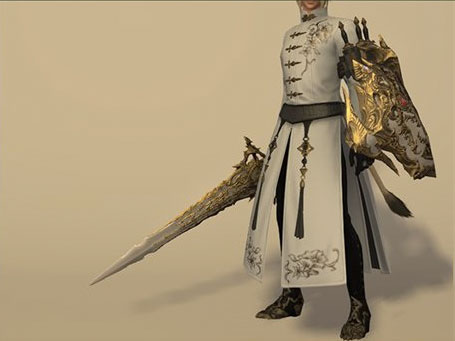
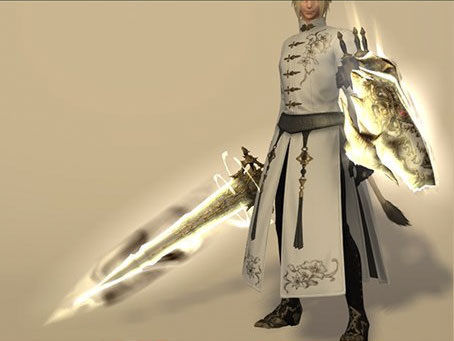
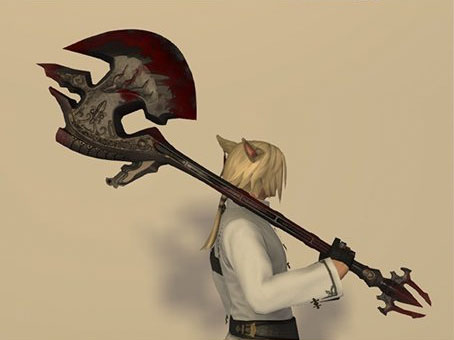
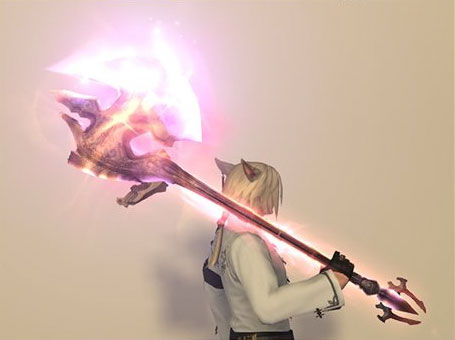
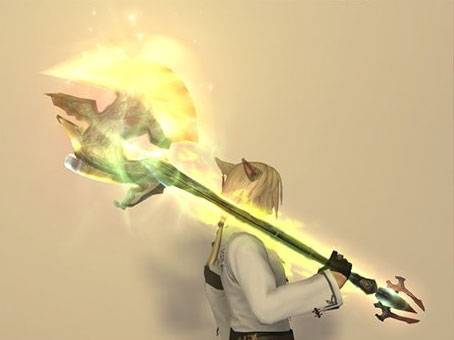
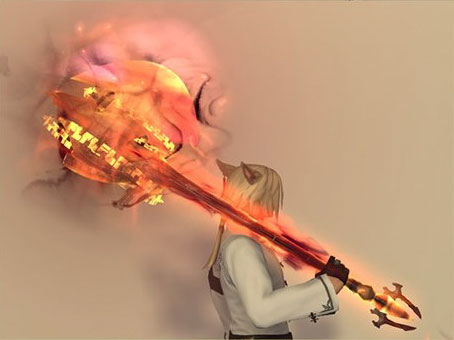
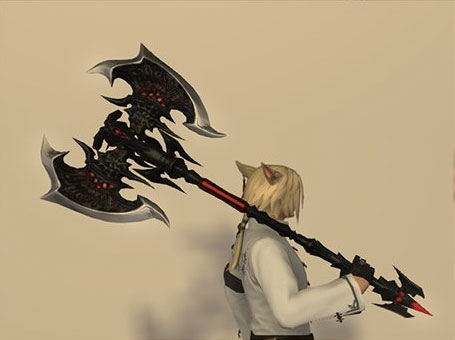
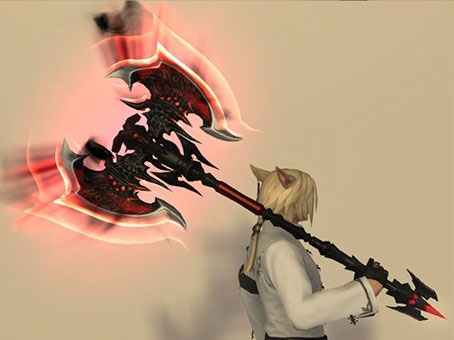
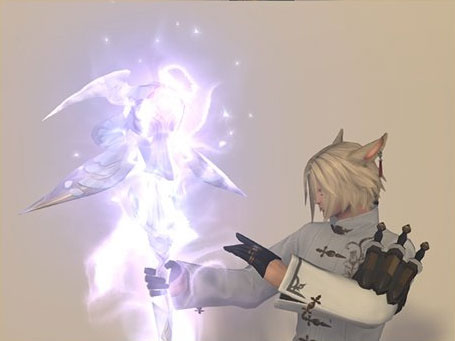
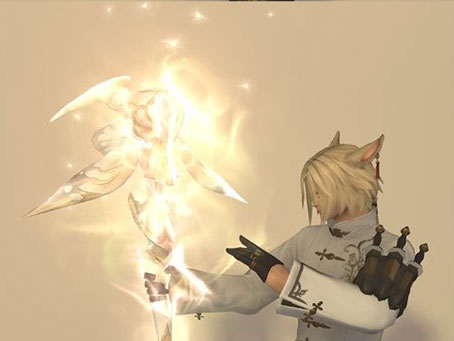
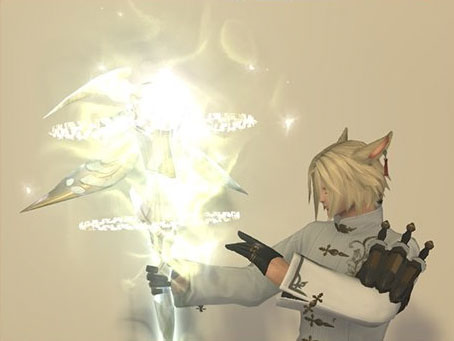
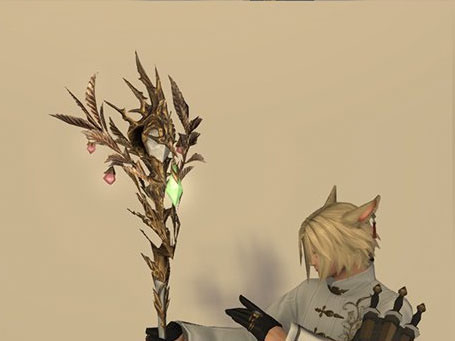
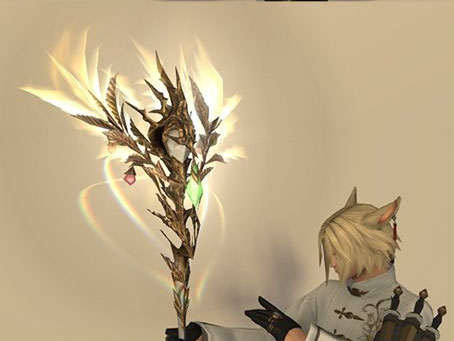
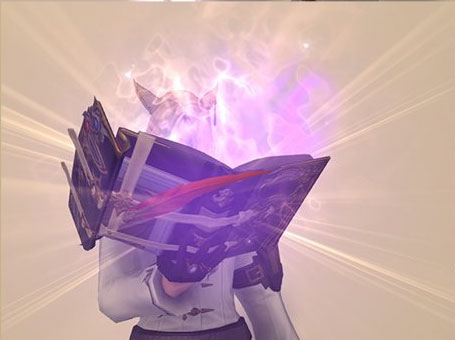
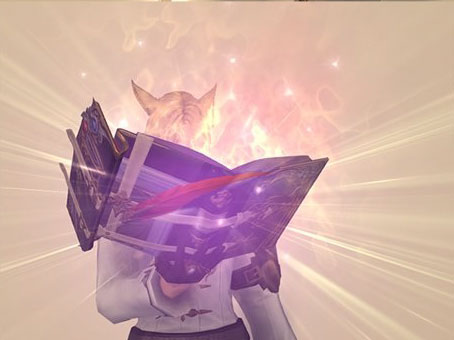
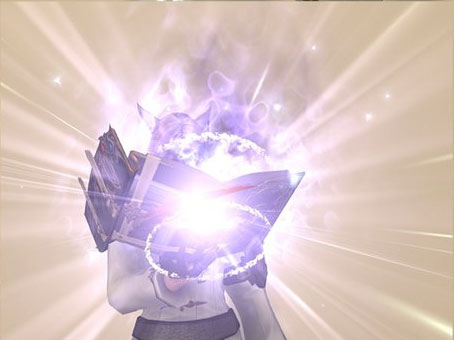
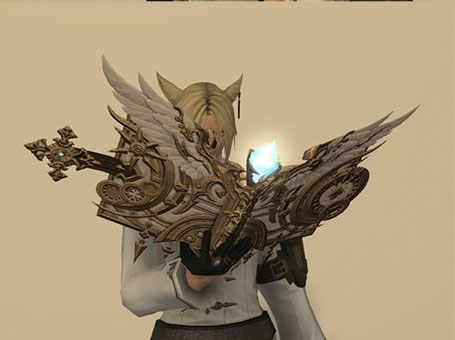
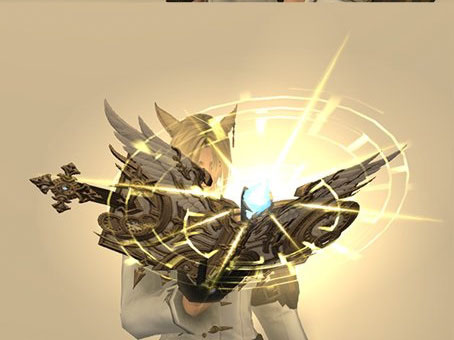
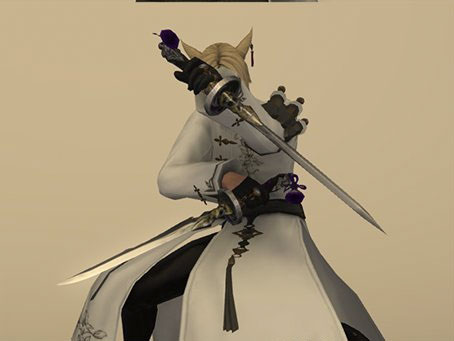
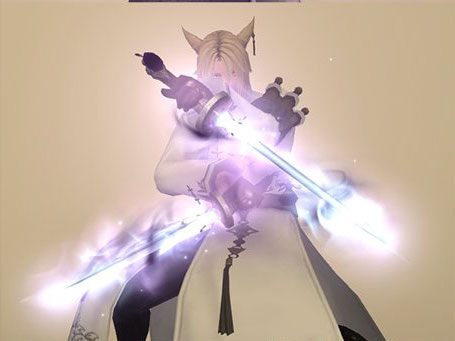
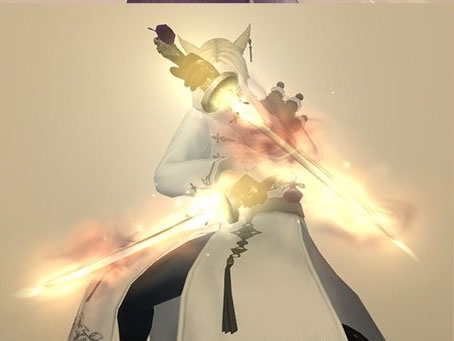
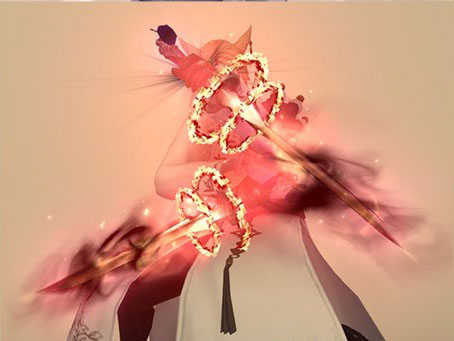
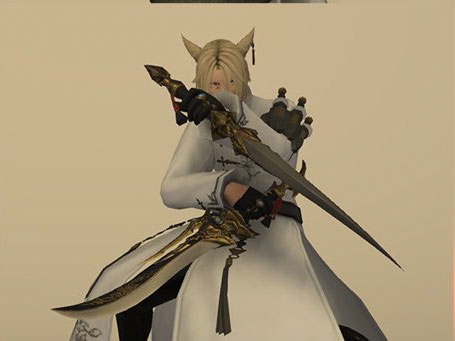
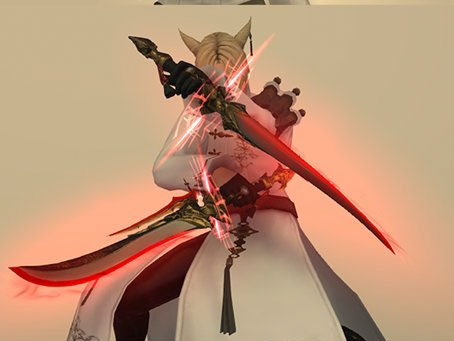
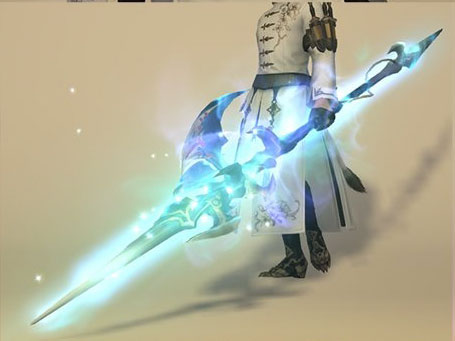
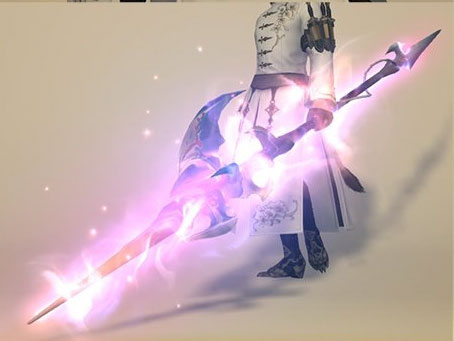
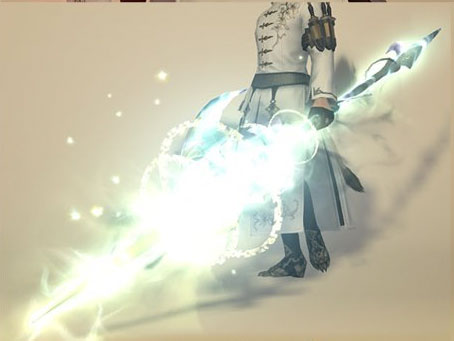
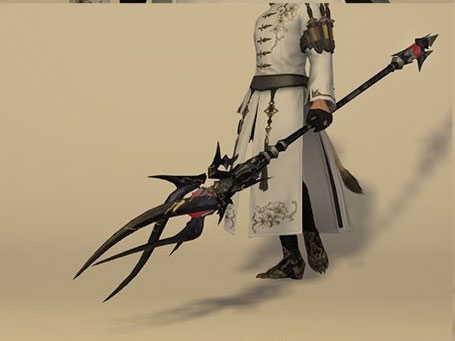
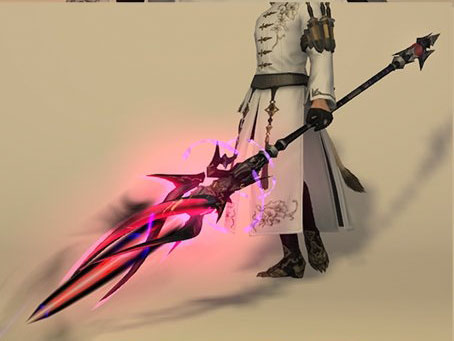
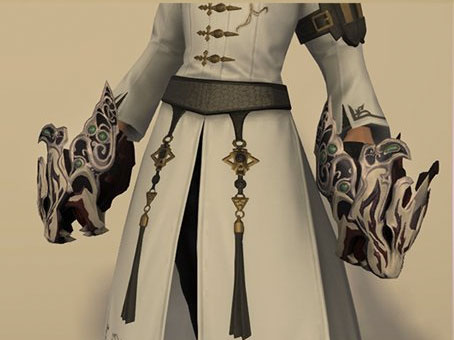
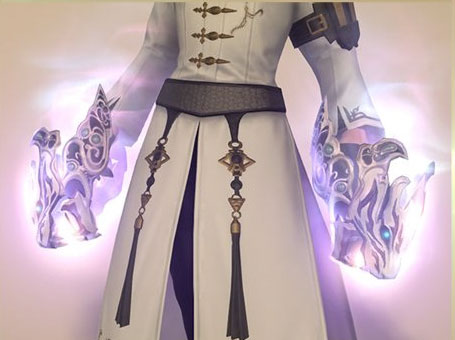
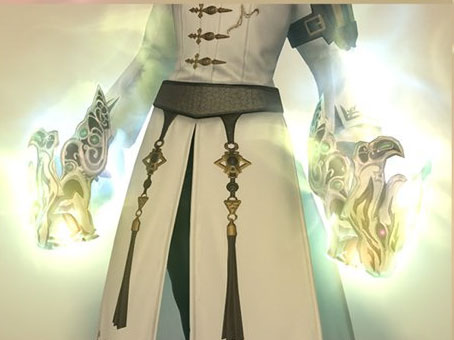
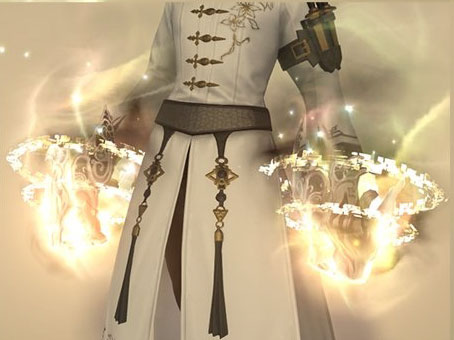
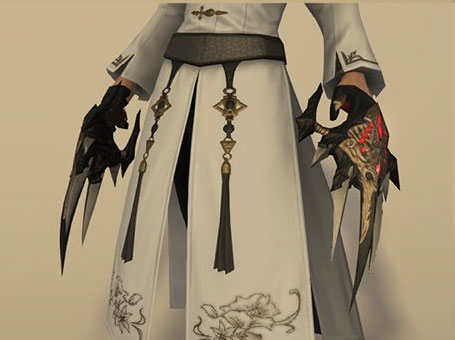
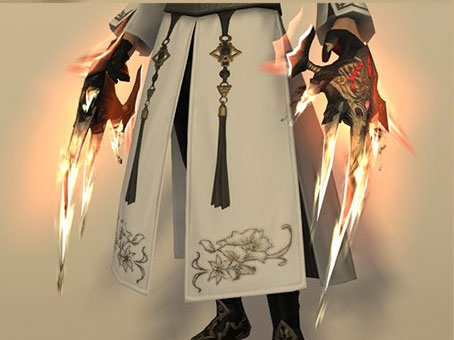
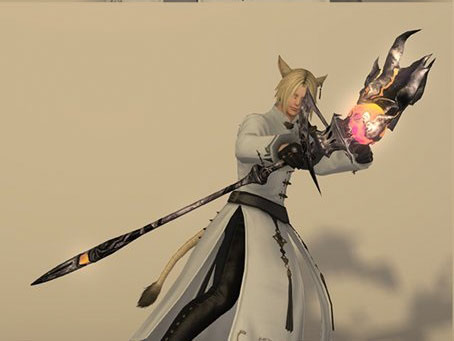
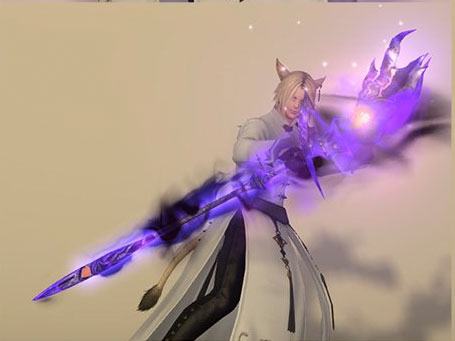
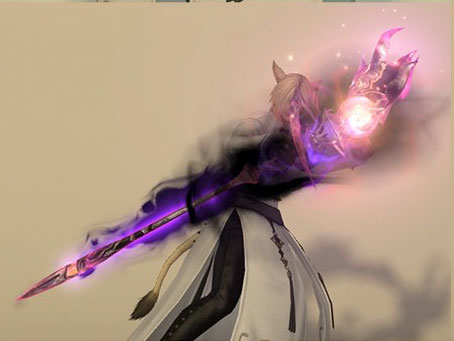
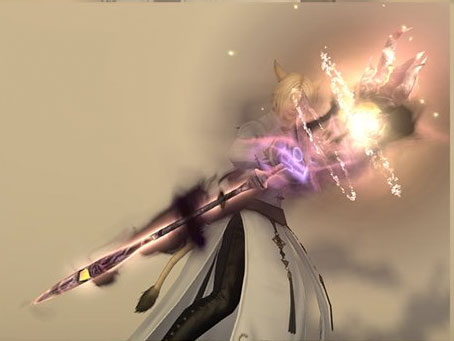
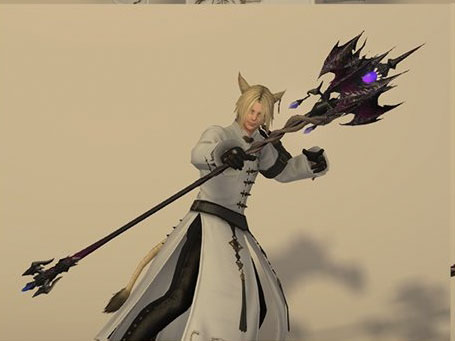
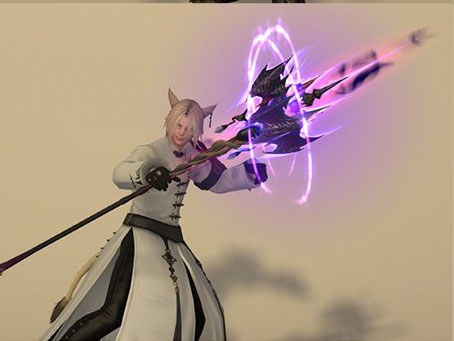
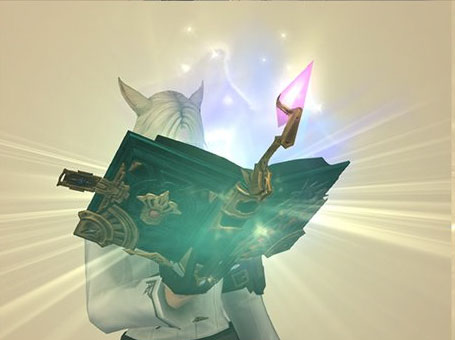
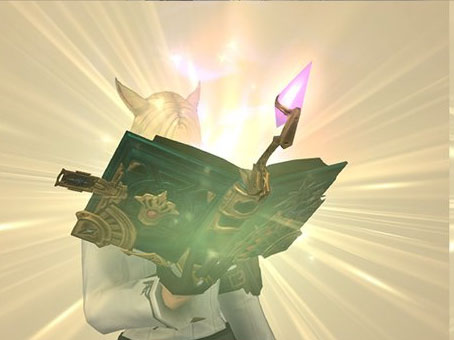
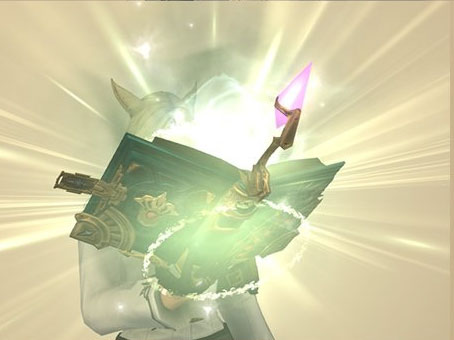
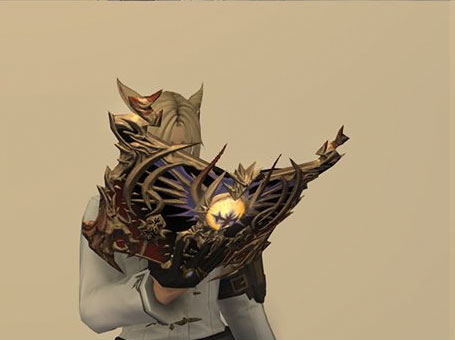
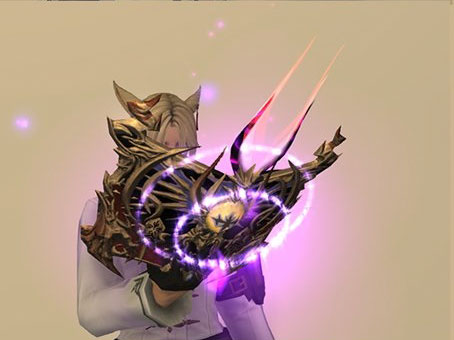
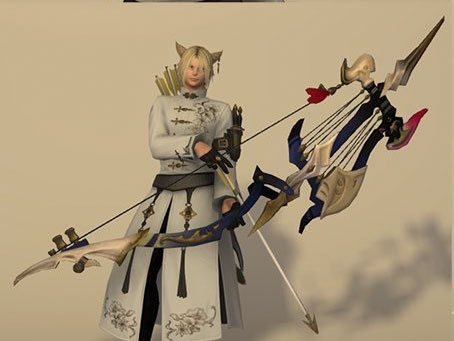
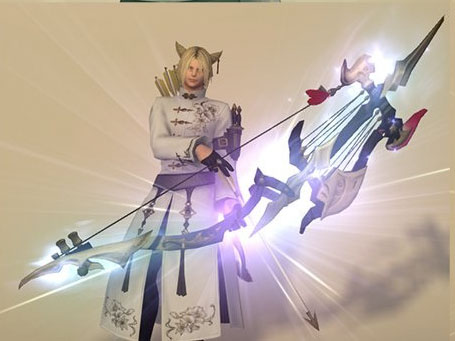
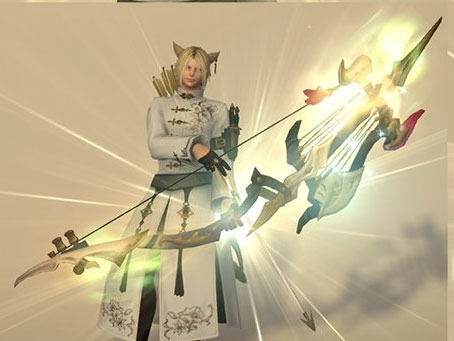
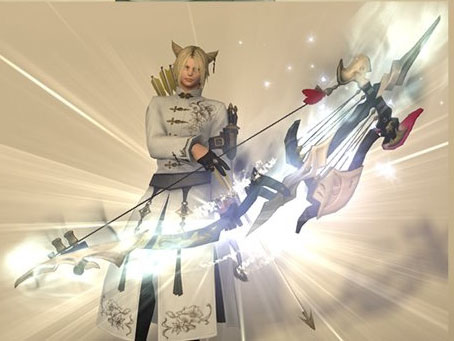
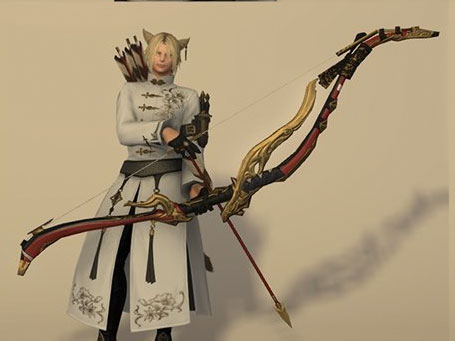
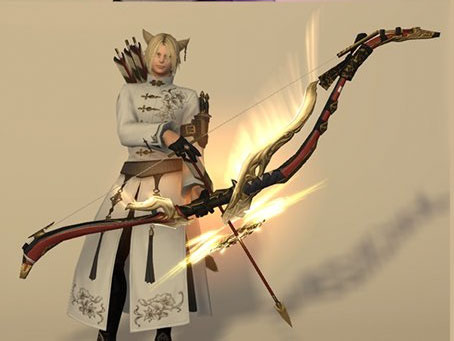
Relic Comparison Gallery
Original Image by @ShibaYoru


You should also read:
Phantom Weapons (Dawntrail)
Lore Harried by circumstances financial and otherwise, Eorzea's finest weaponsmith finds himself on a treacherous journey bound for seas unknown. Yet amidst the peril is an opportunity to achieve a new pinnacle of weapon fabrication, harnessing arcane powers as potent as they are illusory... Patch…
Continue reading...Anima Weapons (Heavensward)
Lore A young researcher hailing from the Near East has come to Eorzea in search of aid. His field of study? Anima, an essence he considers to be a reflection of the soul. Through a chance encounter with the master craftsman Gerolt, he and the…
Continue reading...